
2 of 5
Guide 1 — Account Creation & POS Integration
Lightspeed Bump Screen powered by Bump-it · Setup Guide 1 of 4
Create your account, connect your point of sale, and set how many bump screens you need.
Time required about 10 minutes
Before you start
- Have your Lightspeed Back Office login details ready, with admin permission — an integration can’t be enabled without it.
- Your products must already be uploaded to Lightspeed Restaurant.
- Know how many screens your venue needs. Each subscription includes one bump screen and one pass screen.
Part A — Enable the integration and create your account
Step 1
In Lightspeed Back Office, click Integrations in the left menu, then select Lightspeed Bump Screen.
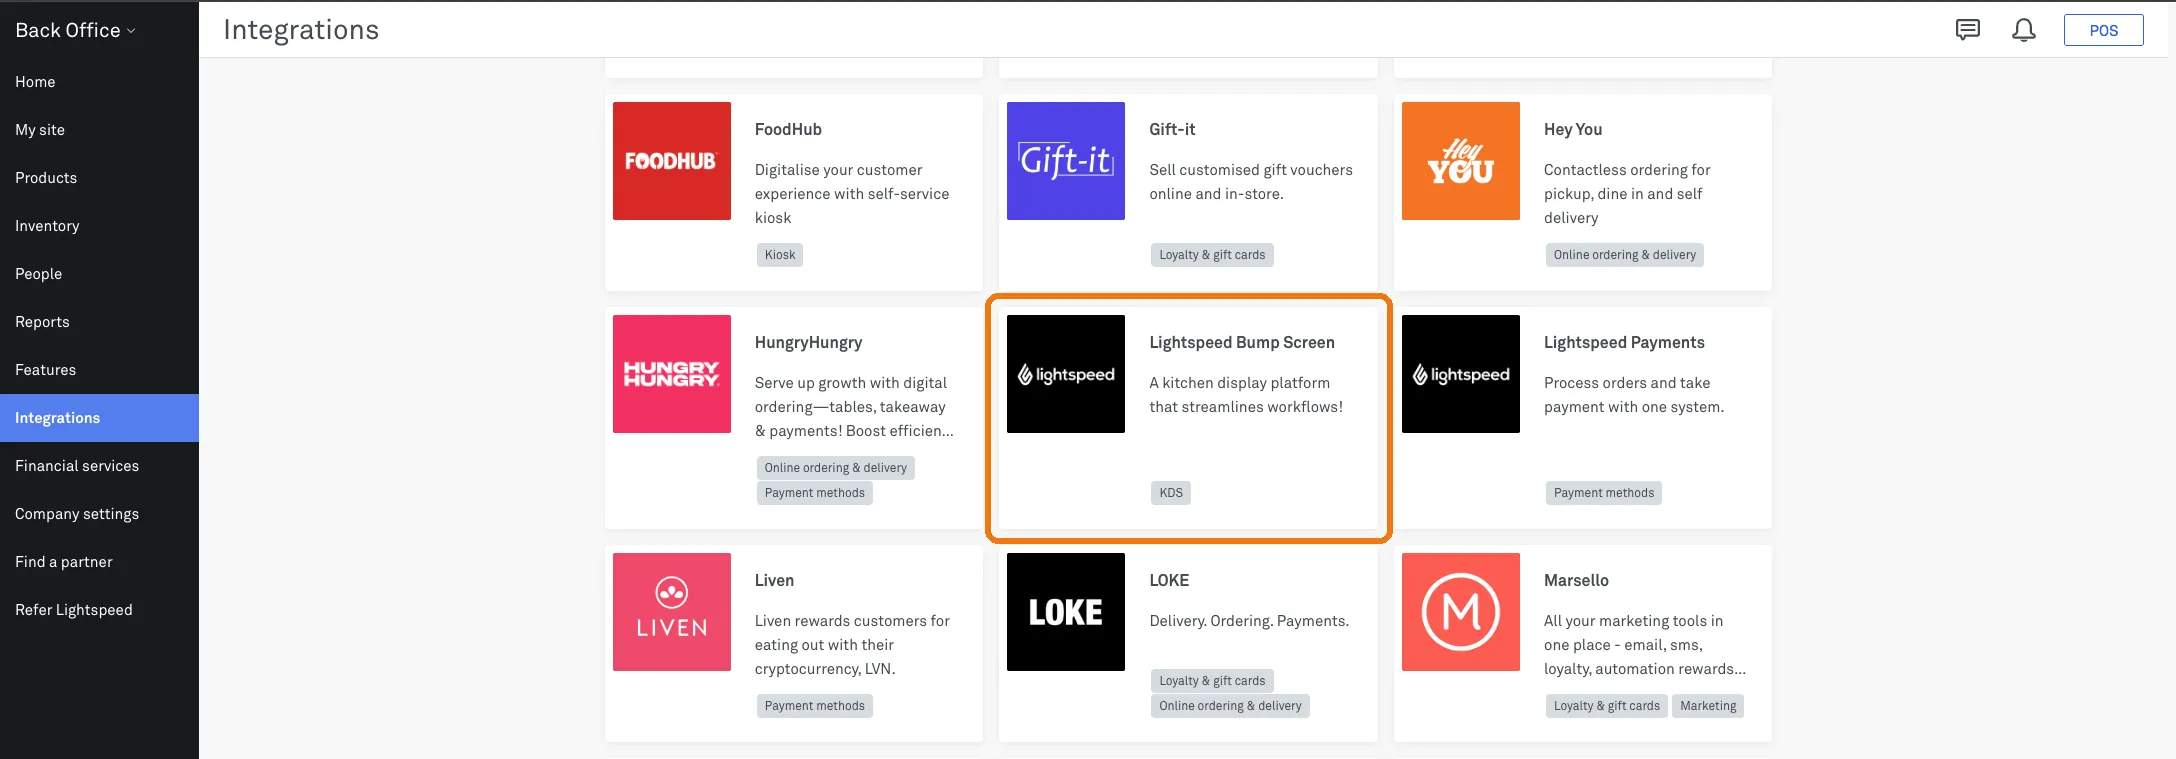
Step 1 — The Integrations page. Lightspeed Bump Screen is circled above.
Click Enable. You are then taken to the Bump-it site to create your account.
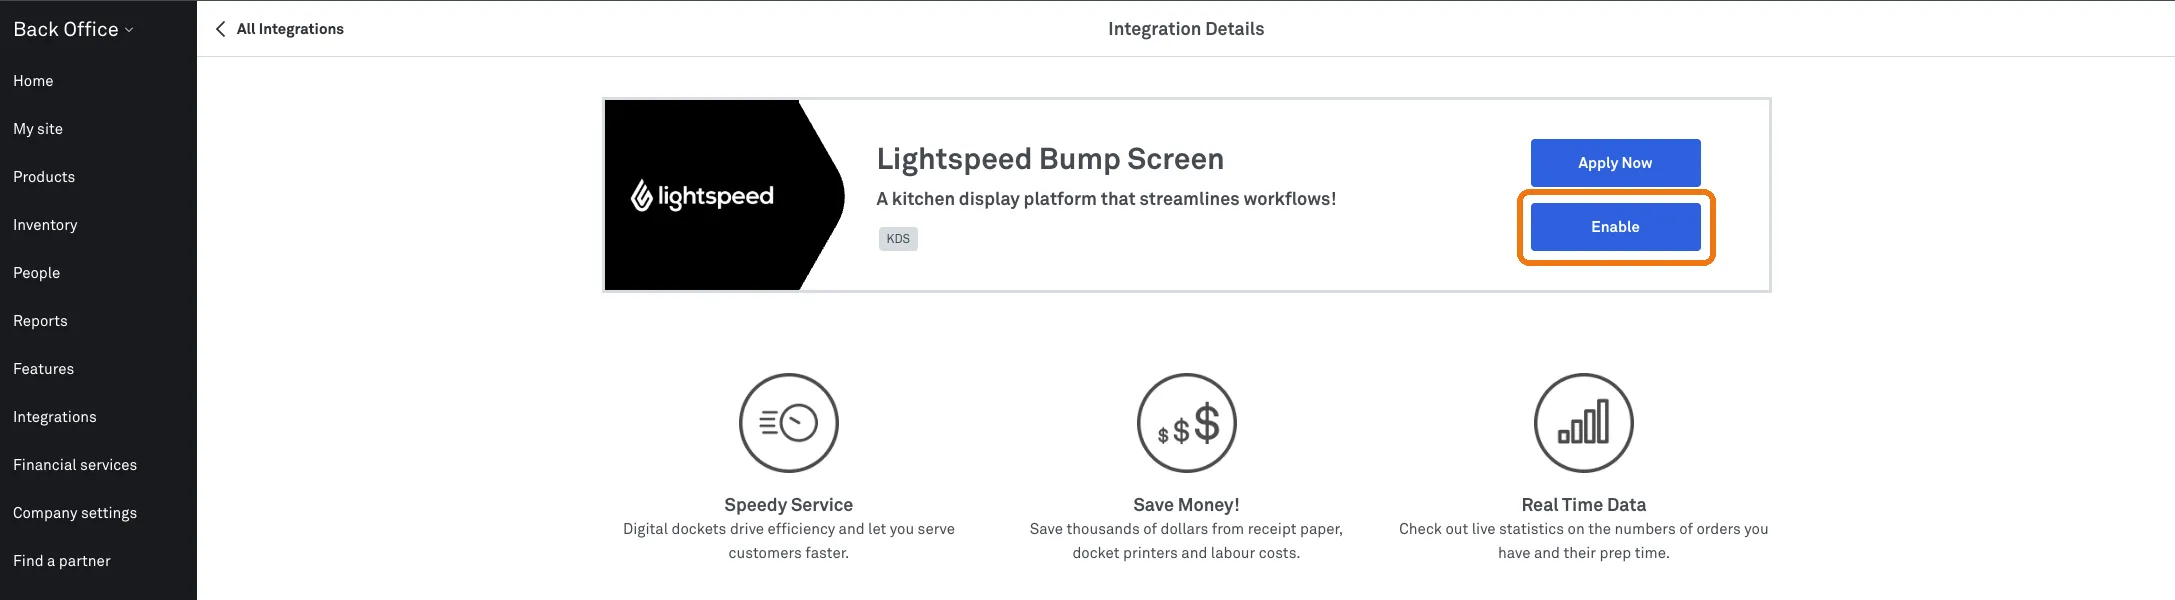
Step 1 — Press Enable (circled above) — not Apply Now, which sits directly above it.
You need admin permission on your Lightspeed account to enable an integration. Check yours under People in Back Office.
You can create the Bump-it account with your existing Lightspeed Back Office login, or set up a separate login just for Bump-it.
Step 2
On the login screen, click Create an account (bottom right).
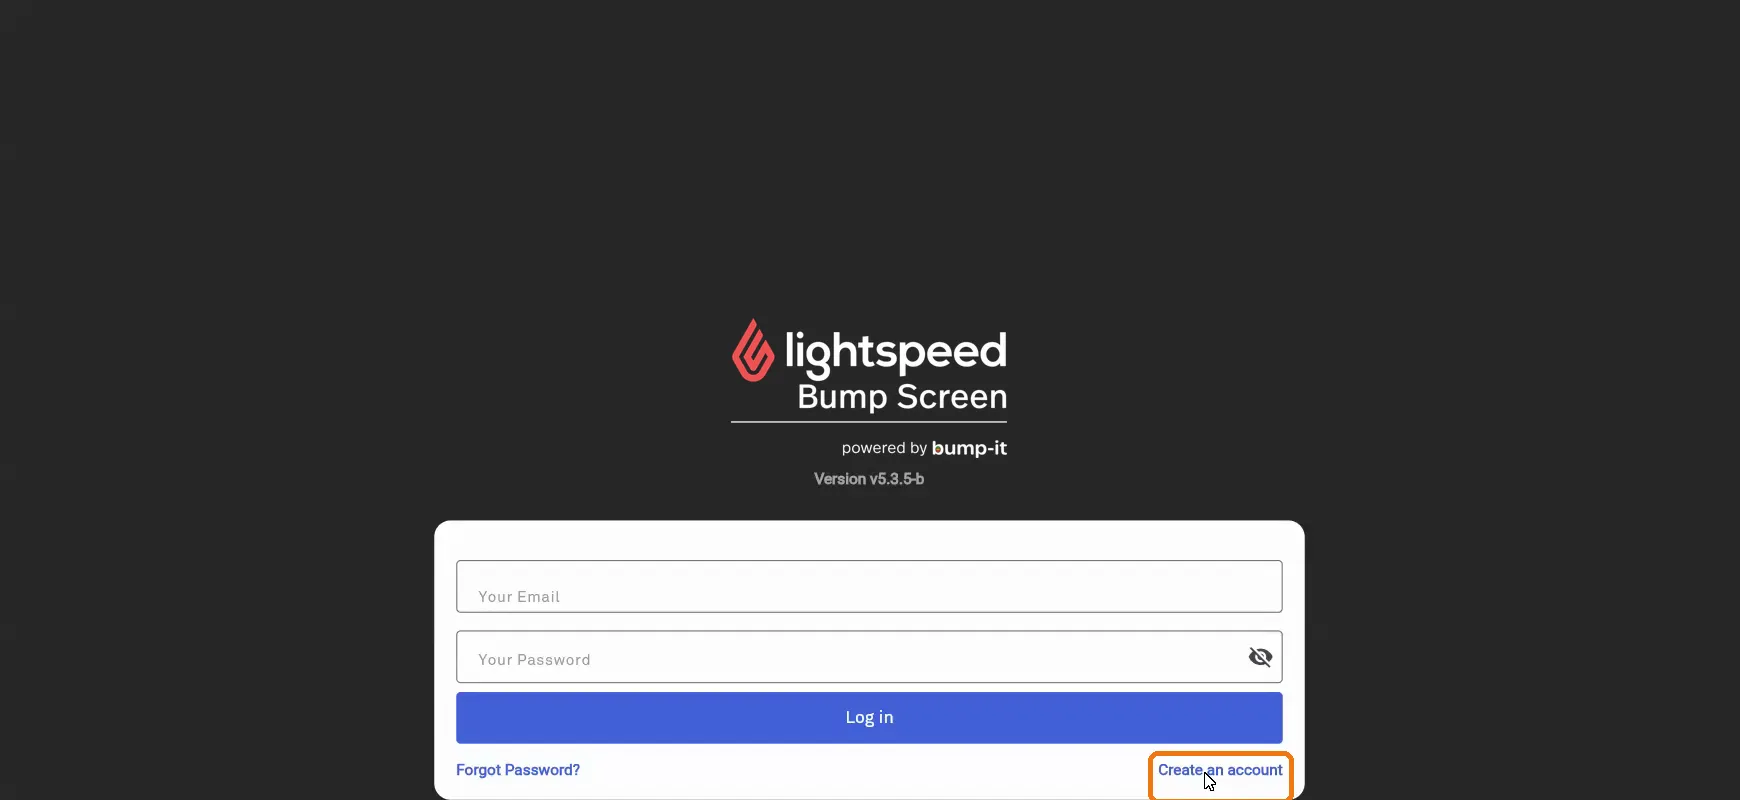
Step 2 — Login screen. Already have an account? Log in here instead.
Step 3
Fill in your details, choose your point of sale under Select API, and check the time zone is correct. Tick I agree to the terms, then click Register.
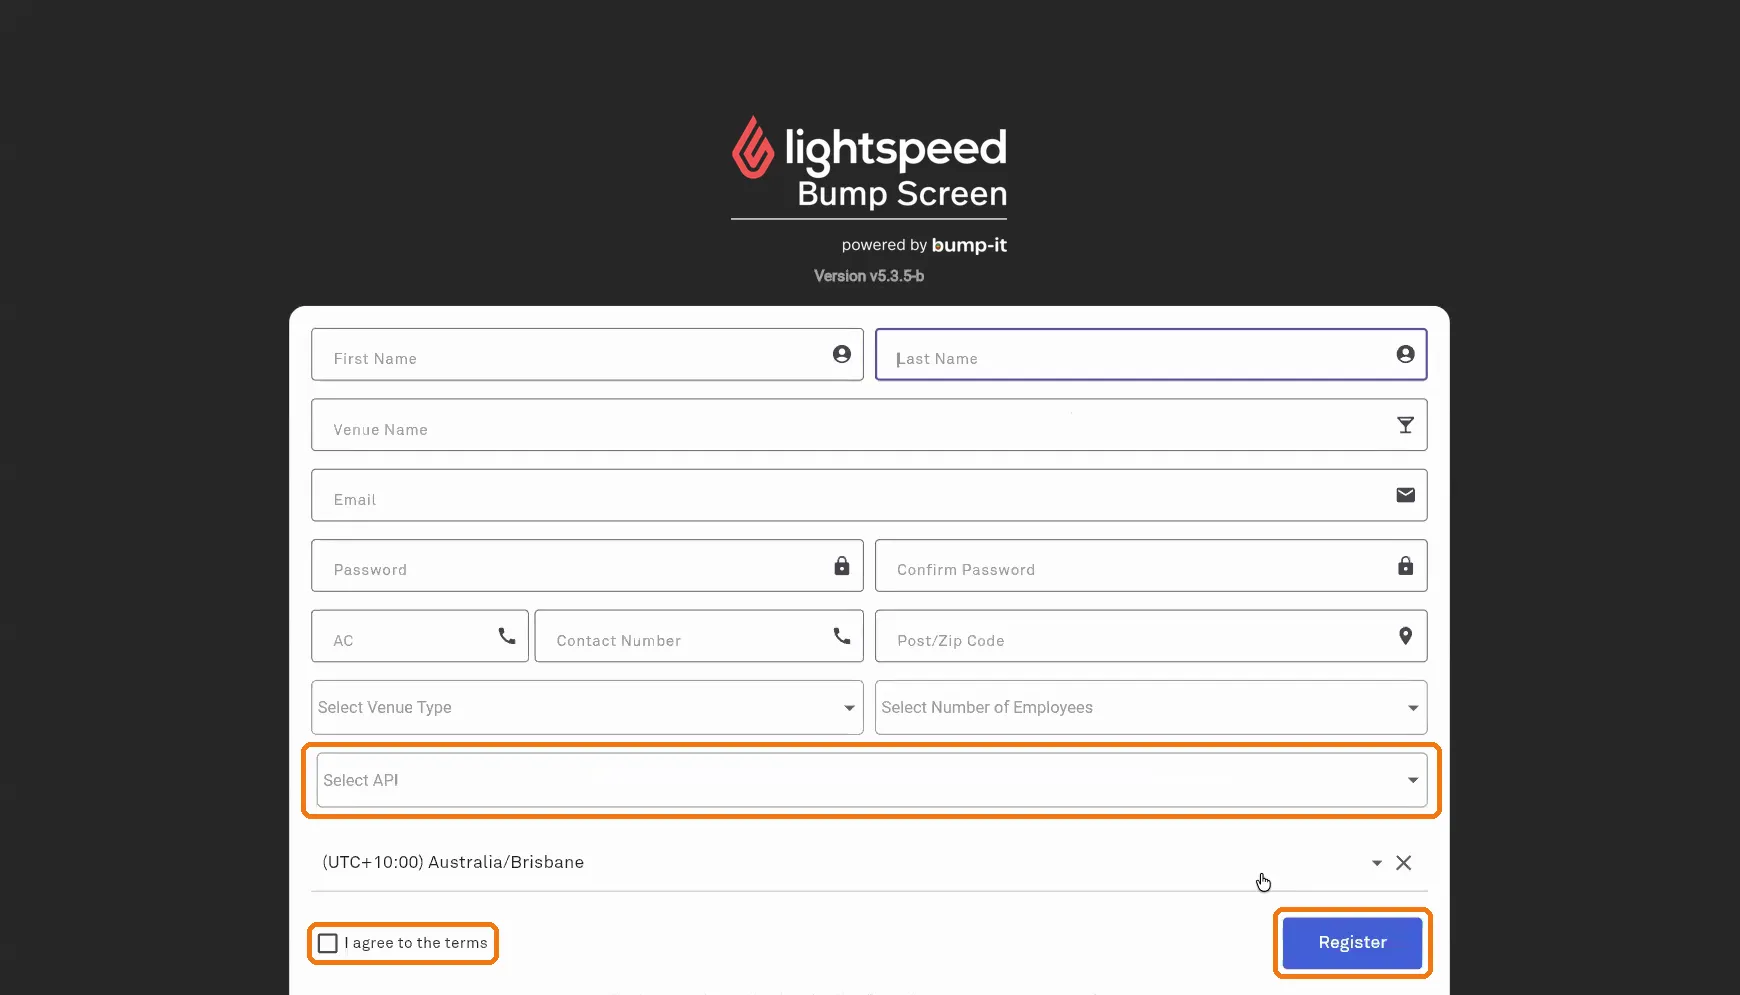
Step 3 — Registration form. Select API is your point-of-sale integration.
Select API is the point-of-sale field. If you pick the wrong one here, no orders will reach your bump screen.
Step 4
Log in with your email and password.
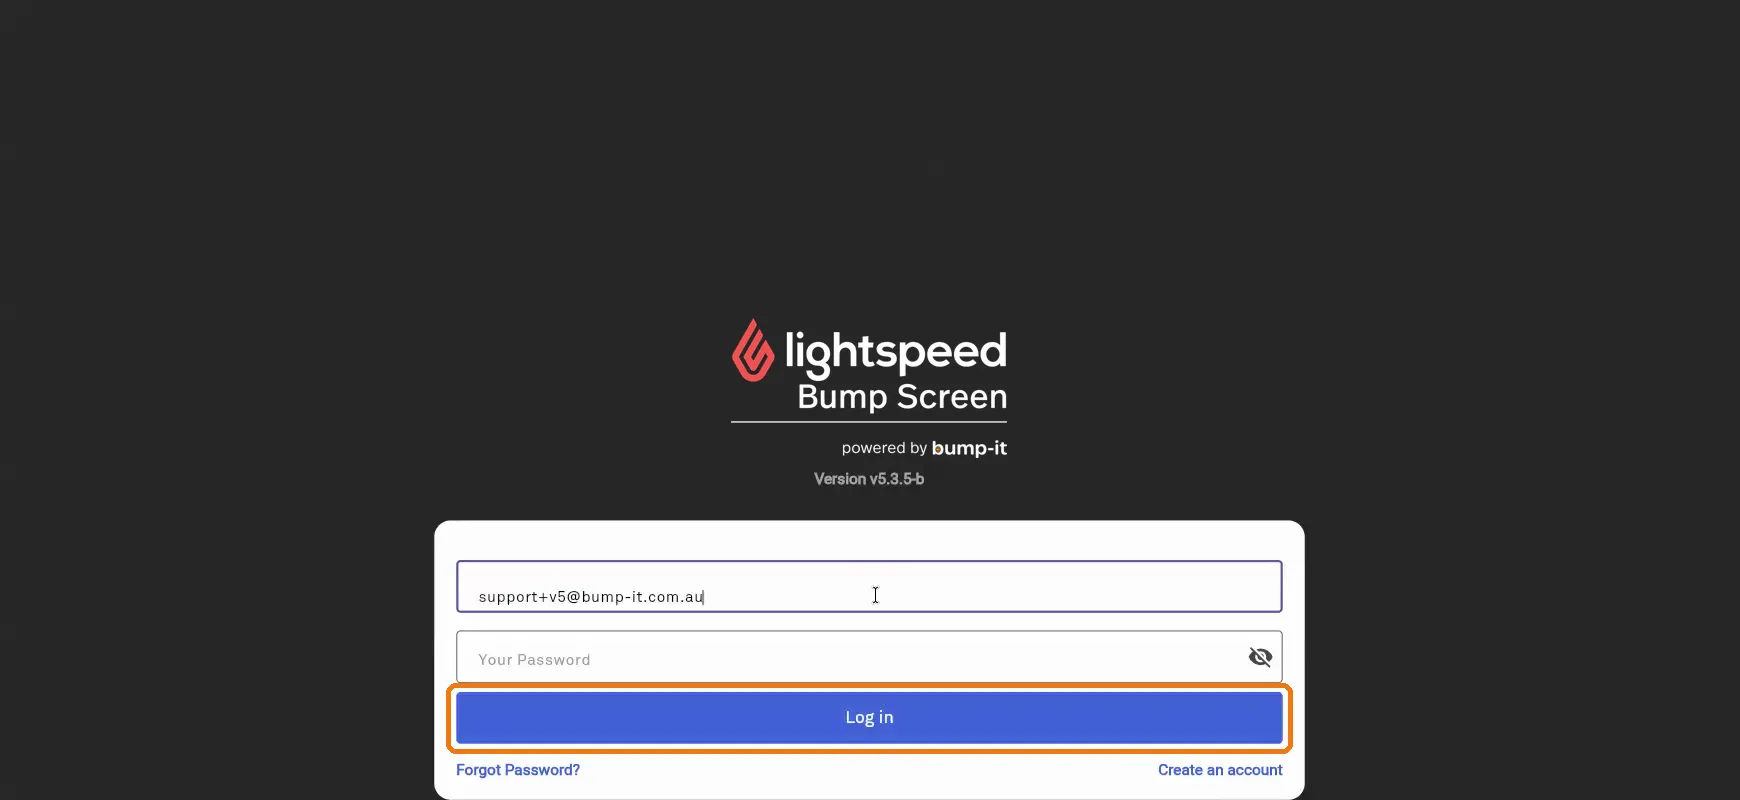
Step 4 — Log in.
Step 5
You land on the Dashboard. It tracks your setup progress with a tick or cross against each step.

Step 5 — Dashboard. Left sidebar: Dashboard · Sites · Support · Report.
Part B — Link your point of sale
Step 6
Click Sites in the left sidebar, then click + Link New Account.

Step 6 — Sites page. + Link New Account is circled above.
Sites is where everything lives. If you ever get lost, click Sites to come back here.
Step 7
+ Link New Account takes you straight to the Lightspeed Back Office login.

Step 7 — The Back Office login for Lightspeed Restaurant POS (O-Series). Your account is circled above — or use Log in as another user to sign in as someone else.
Sign in with your Lightspeed point-of-sale username and password. An Authorisation Required window then appears. Choose the company you want to connect from the dropdown, then press Grant Access.
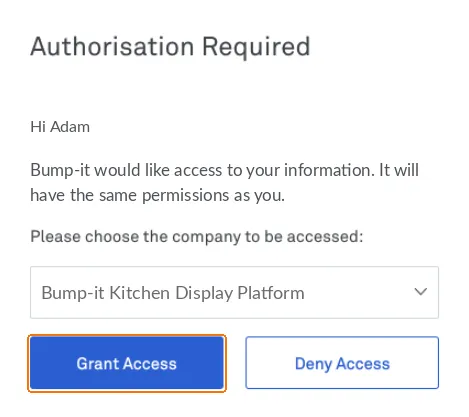
Step 7 — Authorisation Required. Pick the company you’re granting access to, then press Grant Access (circled above).
The sync then runs. Once it completes, press Logout — this is what refreshes your application.
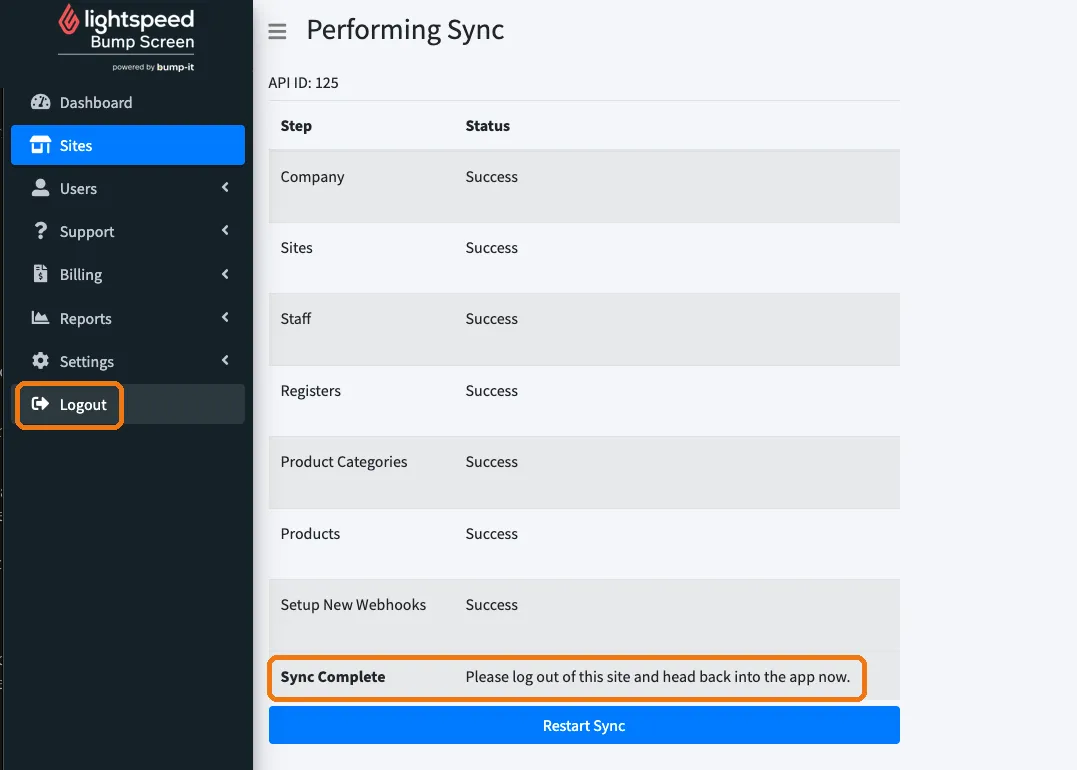
Step 7 — Each step reports Success as it goes. When Sync Complete appears (circled above), press Logout in the left sidebar (also circled).
Step 8
The app is now on a greyed-out screen. Click the ⟳ Refresh button in the middle.
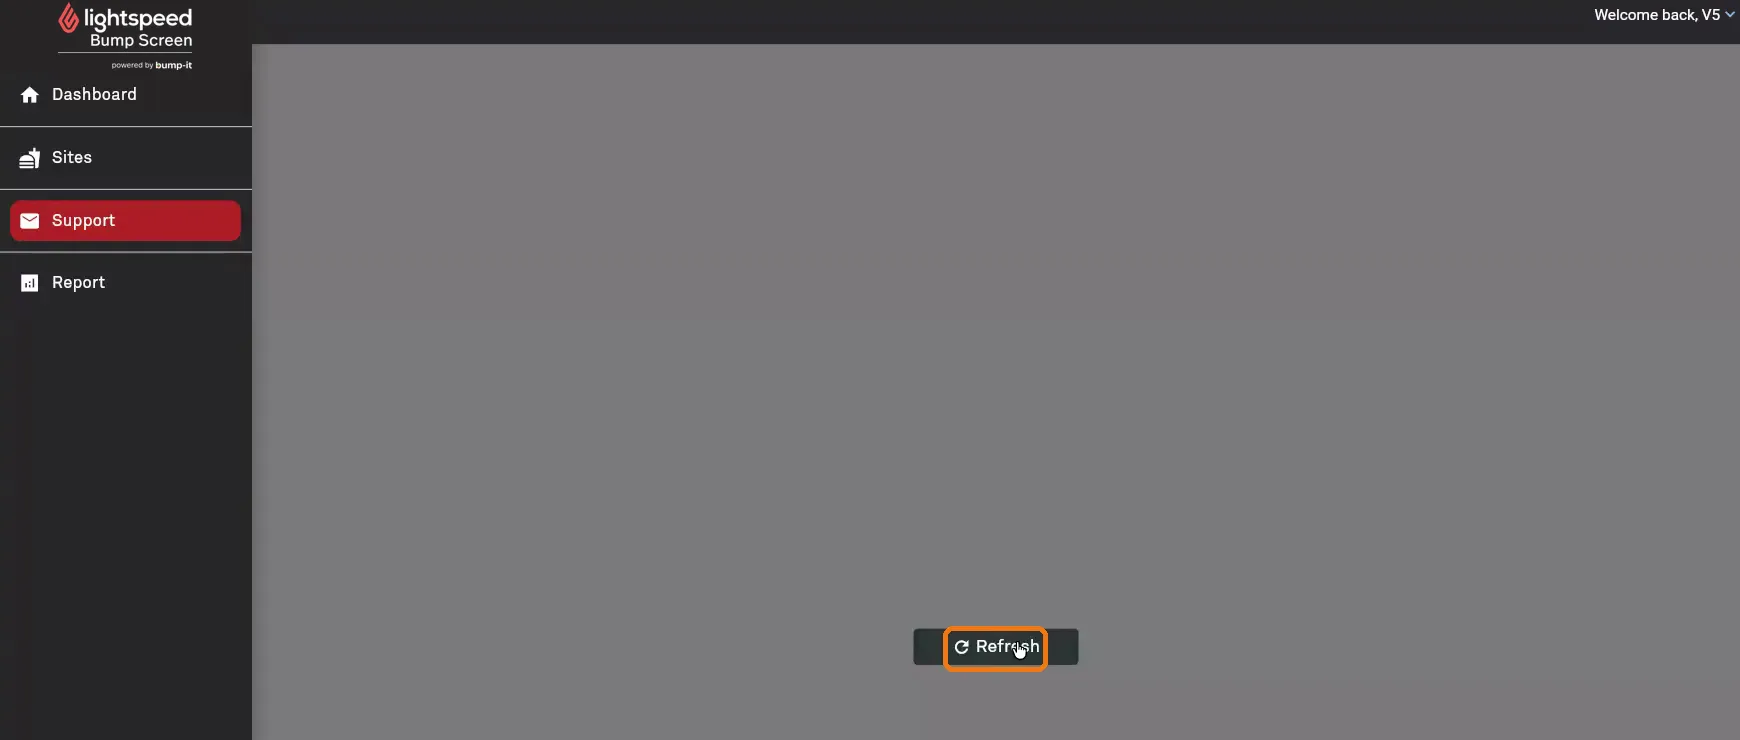
Step 8 — The screen dims and shows a single ⟳ Refresh button. Click it.
Step 9
Your company name appears as the top banner with each venue listed below it.

Step 9 — Your company name is circled above. Each venue is listed below it, with its own Display-It · Read Only · Device · Settings buttons.
Part C — Set your subscription
Step 10
On your site row, click Settings. Under Bump Screen Subscription Plan, click Edit Plan.
Step 10 — Settings sits at the right-hand end of your site row, circled above.
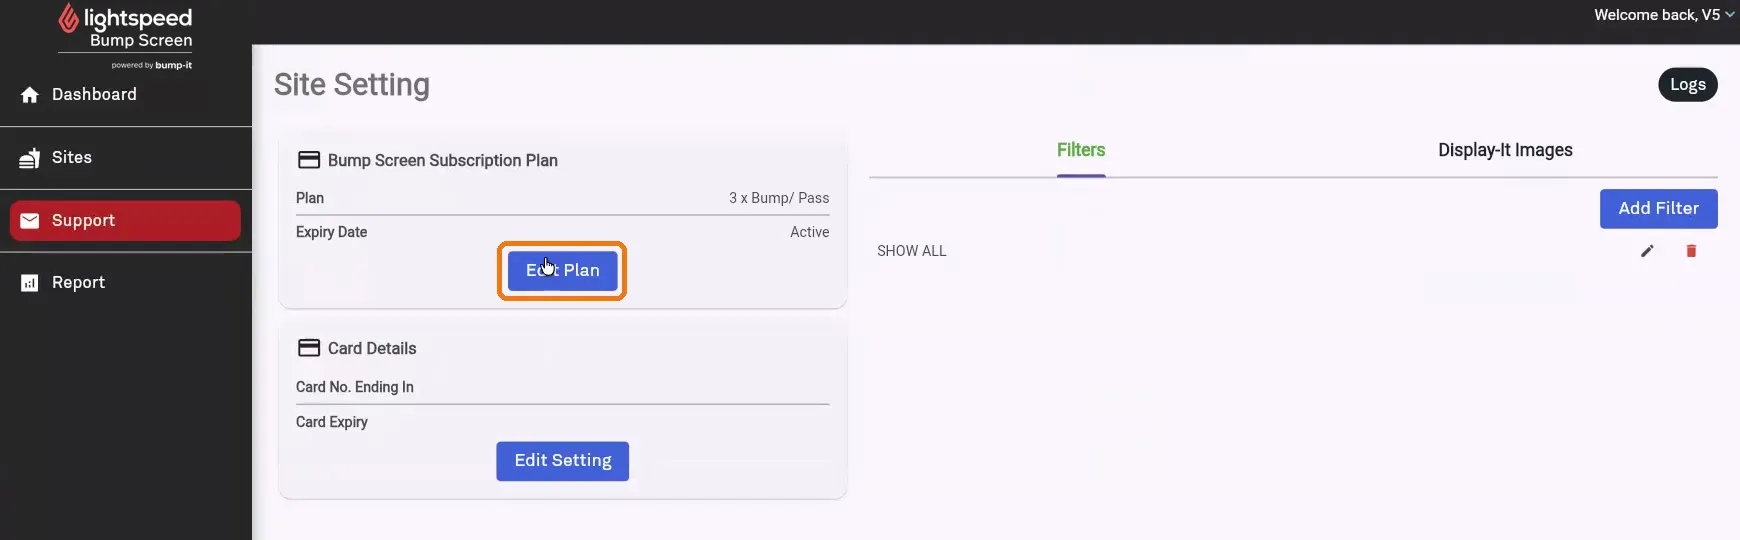
Step 10 — The Site Setting page then opens. Edit Plan is under Bump Screen Subscription Plan.
Step 11
The Gateway opens. Click Edit Plan again, choose how many subscriptions you need, then Save.

Step 11 — Choose how many subscriptions you need here.
Each subscription includes one bump screen and one pass screen. Your plan shows as “1 x Bump / Pass”, “3 x Bump / Pass” and so on.
Set this before adding devices.
Step 12
Click Logout and return to the app. Guide 1 is complete.
Check before moving on
- ☐ You can log in to Bump-it
- ☐ Your company name and venues appear on the Sites page
- ☐ Your subscription shows the correct number of screens
What’s next
| Guide | Covers |
|---|---|
| Guide 2 — Adding & Configuring Devices | Add each screen and set its permissions |
| Guide 3 — Creating & Configuring Filters | Choose what appears on each screen |
| Guide 4 — Using the Bump Screen | Day-to-day use for your staff |
Source: “Bump-it New UI Setup Guide” recording, 28 July 2026, 00:00–02:40. App version v5.3.5-b.
Lightspeed Bump Screen powered by Bump-it · bump-it.io · Percentage Plus Holdings Pty Ltd