
5 of 5
Guide 4 — Using the Bump Screen
Bump-it Kitchen Display Platform · Setup Guide 4 of 4
Everything your kitchen and floor staff need: reading a docket, bumping, holding, combining and undoing. **This is the guide to hand to your team.**
Before you start
- You MUST complete Guides 1, 2 and 3 before starting this guide — until they’re done, no dockets will appear.
- What each person can do depends on the permissions set on their device in Guide 2.
Part A — Open the screen
Step 1
Go to Sites (circled above) and click the green Go to bump screen button on your site row.

Step 1 — The green Go to bump screen button is circled above.
Step 2
The bump screen opens. Orders arrive from the point of sale automatically.
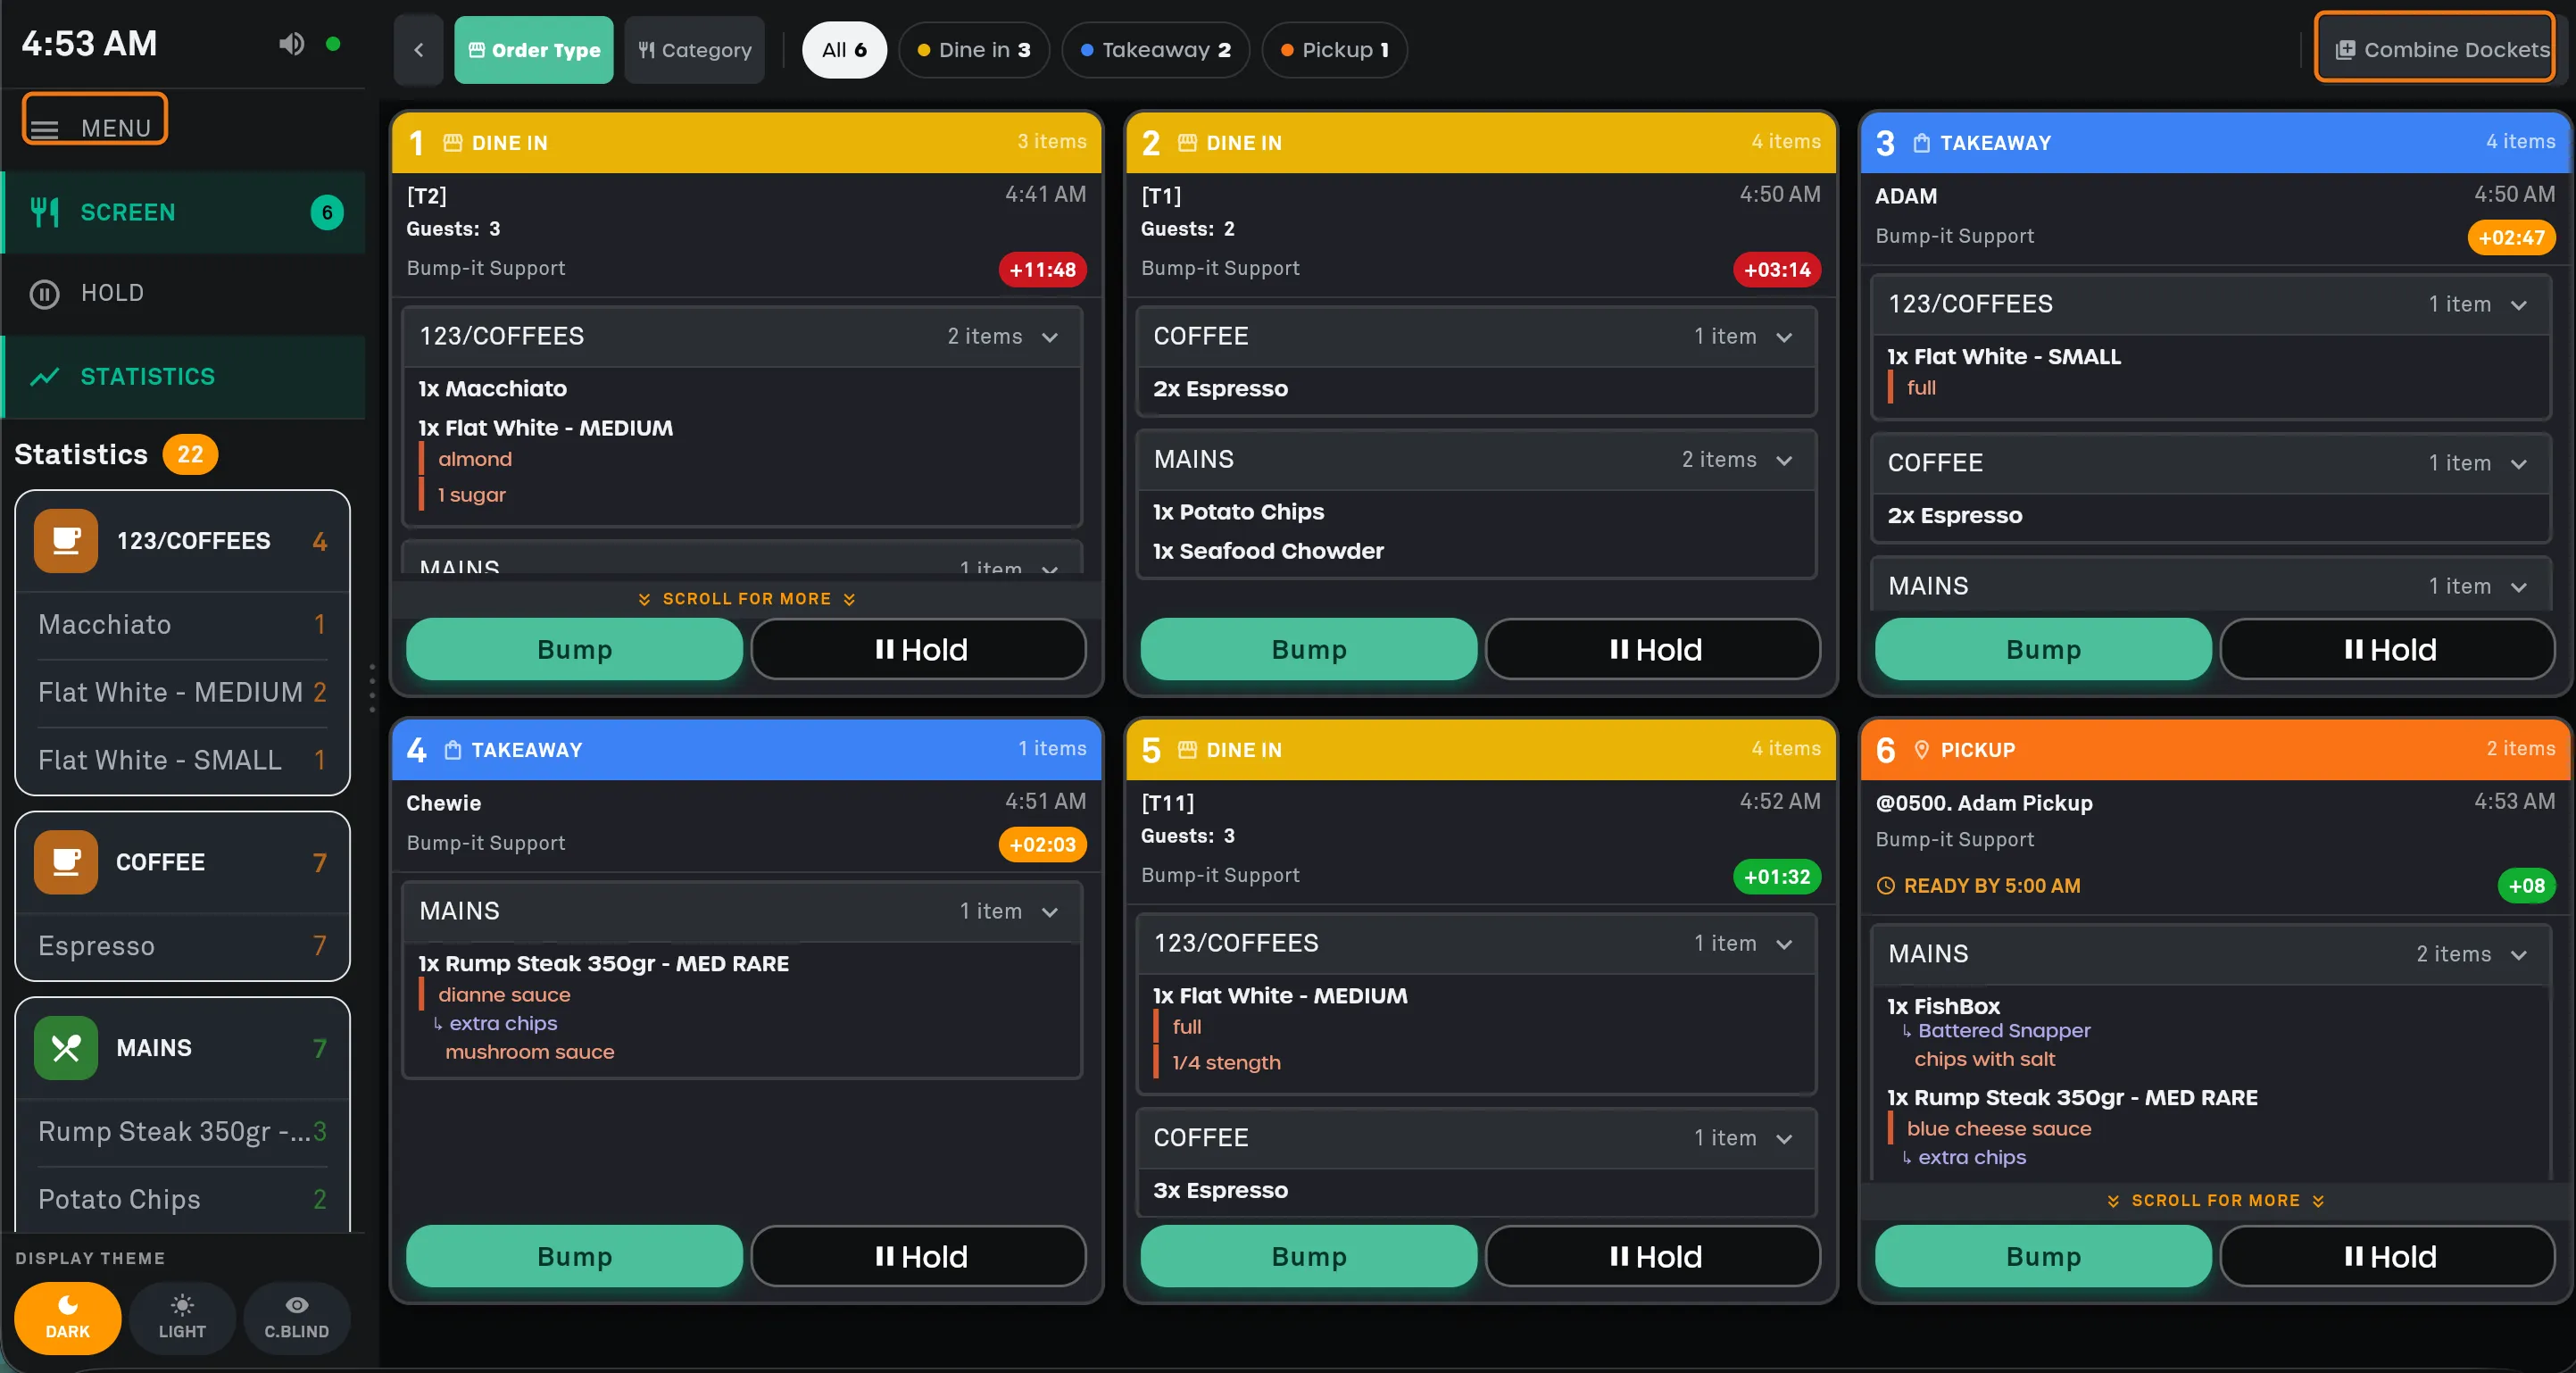
Step 2 — Left sidebar: the clock, then MENU (circled above) · SCREEN · HOLD · STATISTICS, with the DISPLAY THEME switcher at the bottom. Top bar: the quick action bar, with Combine Dockets (circled above) at the far right.
Part B — Reading a docket
Step 3
Learn the parts of a docket. Everything on it comes from the point of sale. Each numbered arrow on the left points to the matching row on the right.
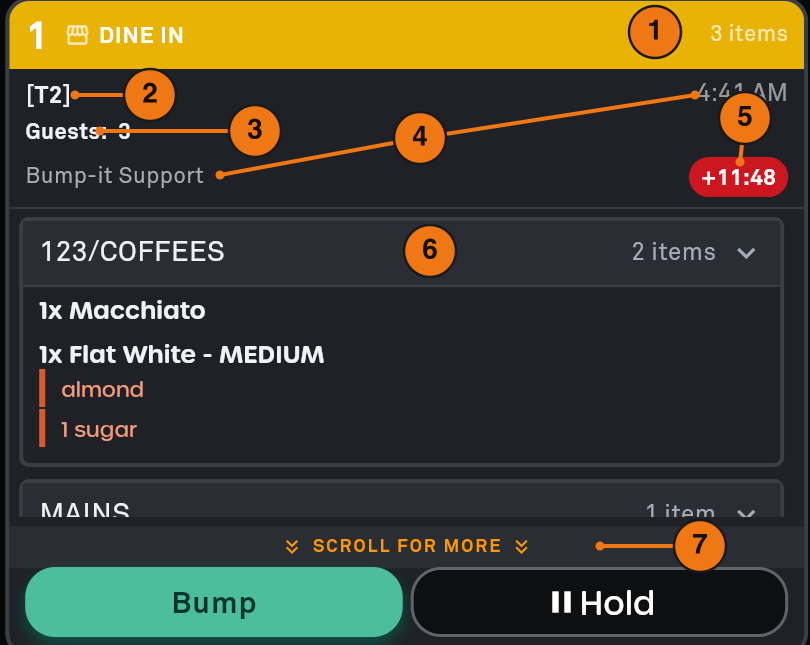 |
|
Step 3 — A docket in detail, numbered to match the table.
Step 4
Watch the timer colour. Dockets start green, turn amber at the first alert, then red at the second.
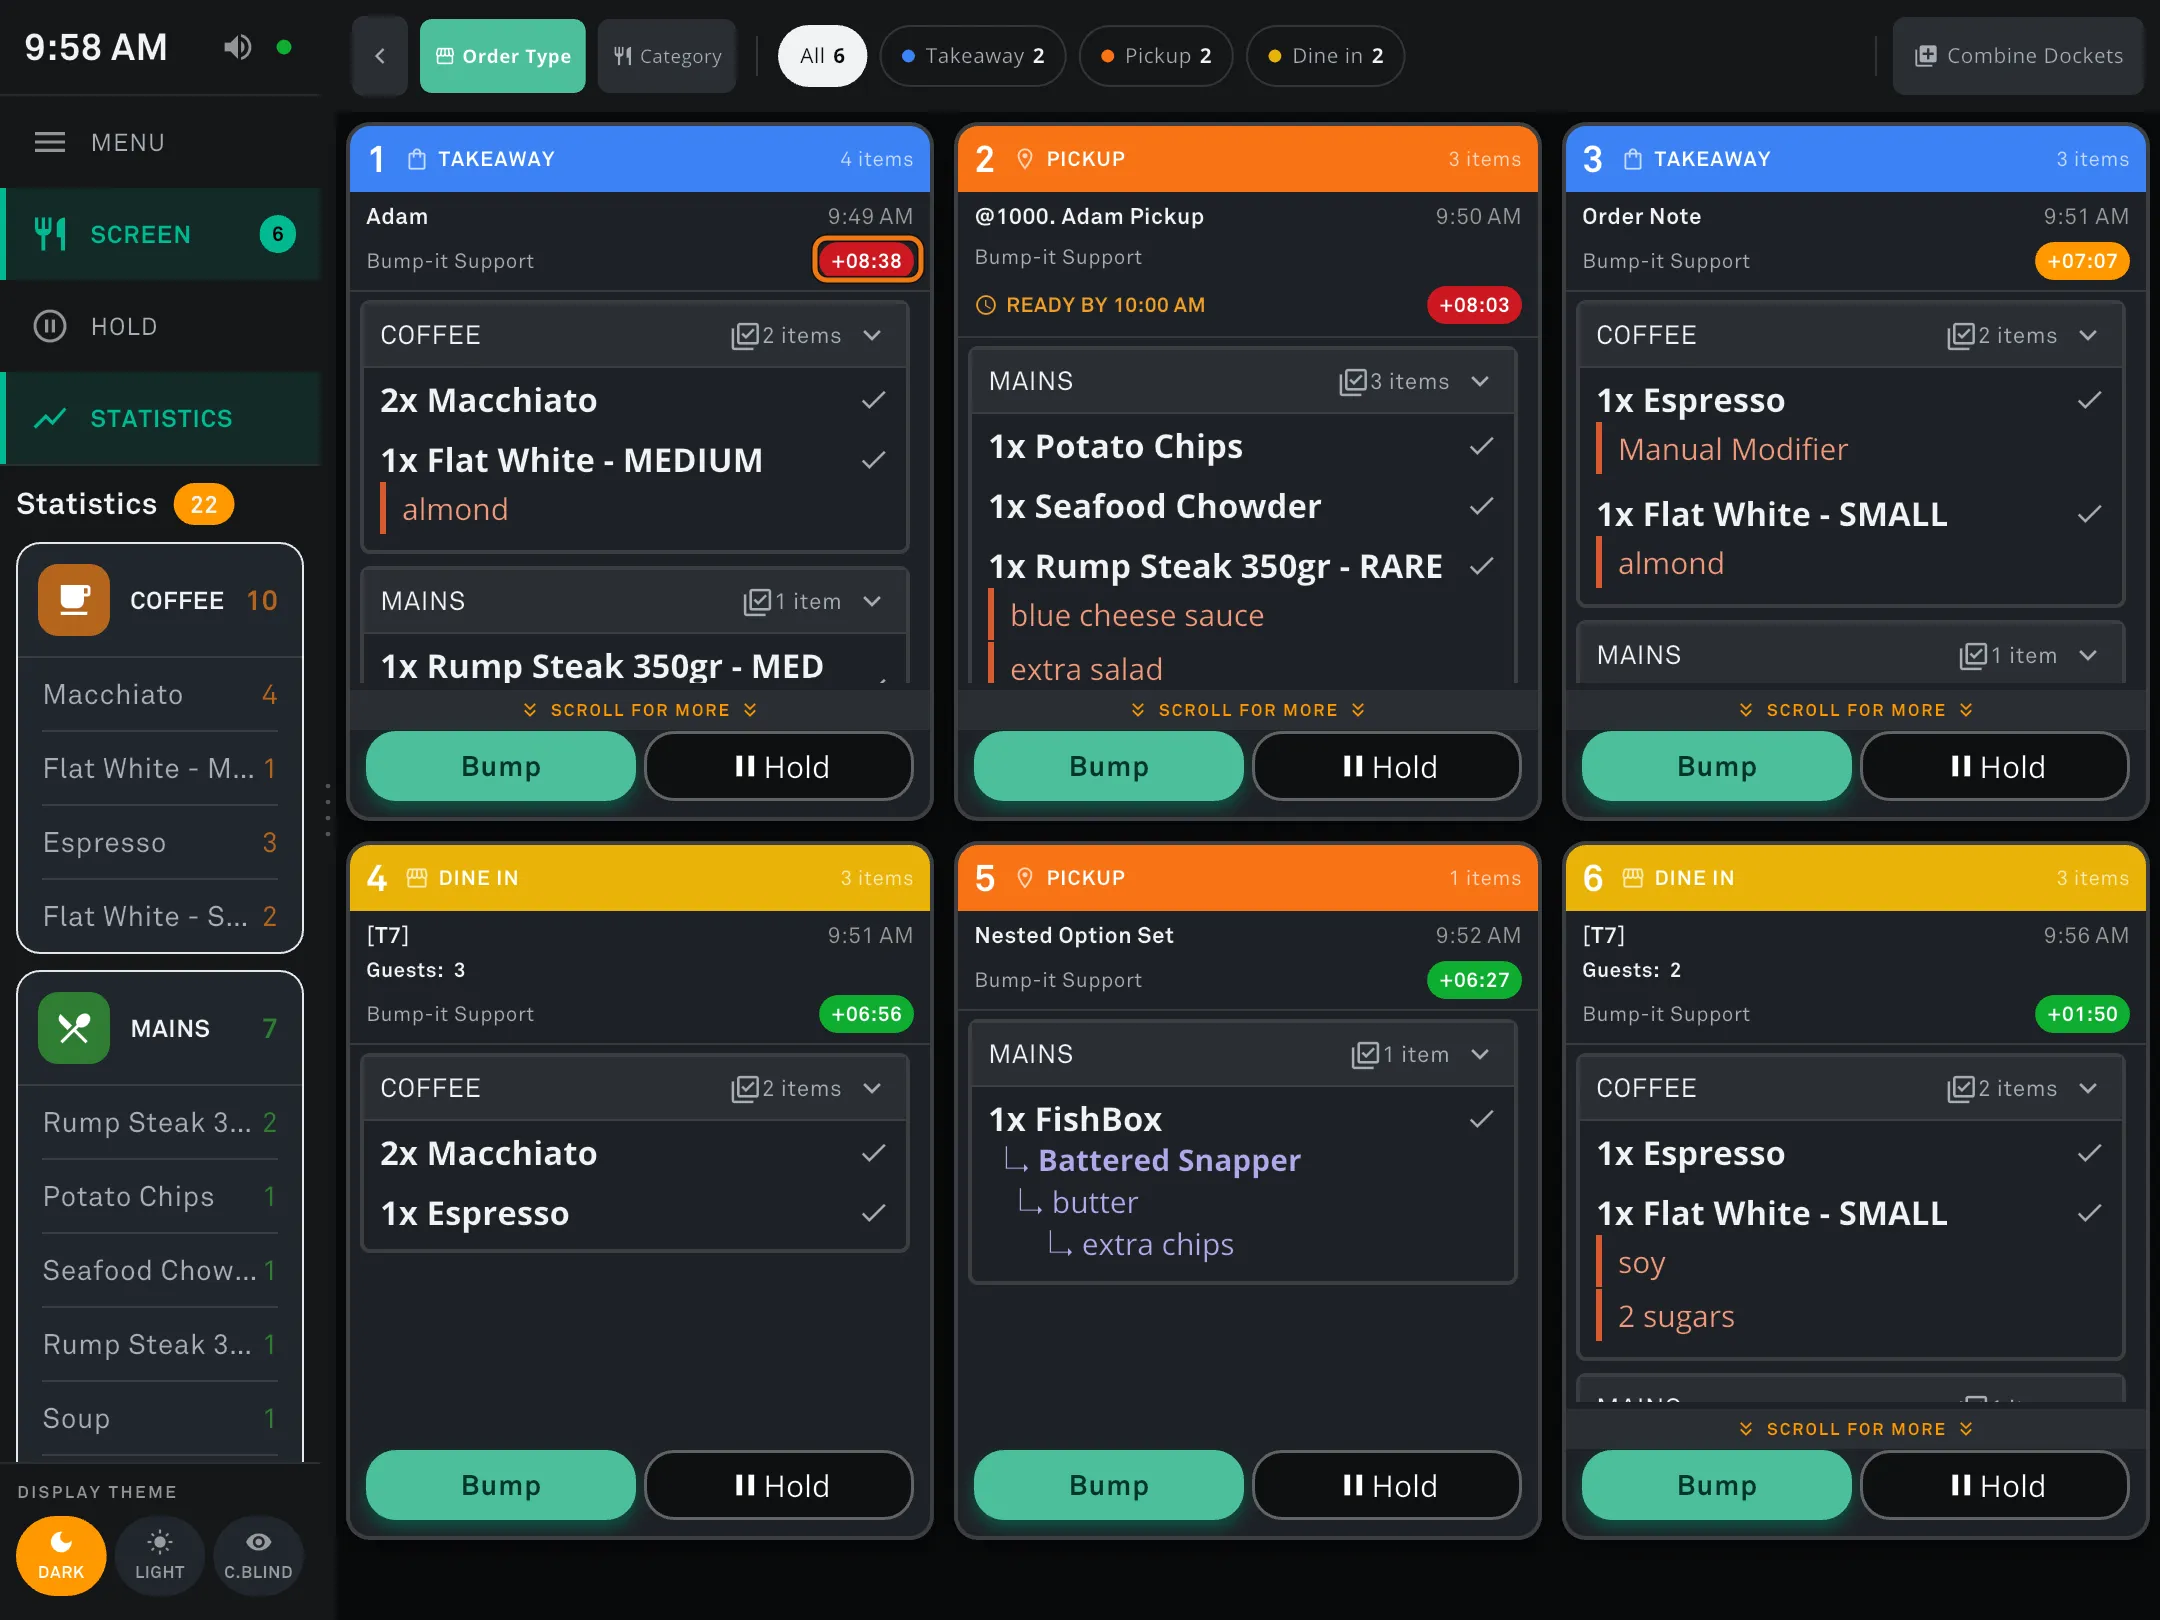
Step 4 — The timer is circled above. Each docket ages independently, so the board shows every stage at once here — green, amber and red side by side.
Step 5
To free up space, collapse a category by pressing the chevron on its header.
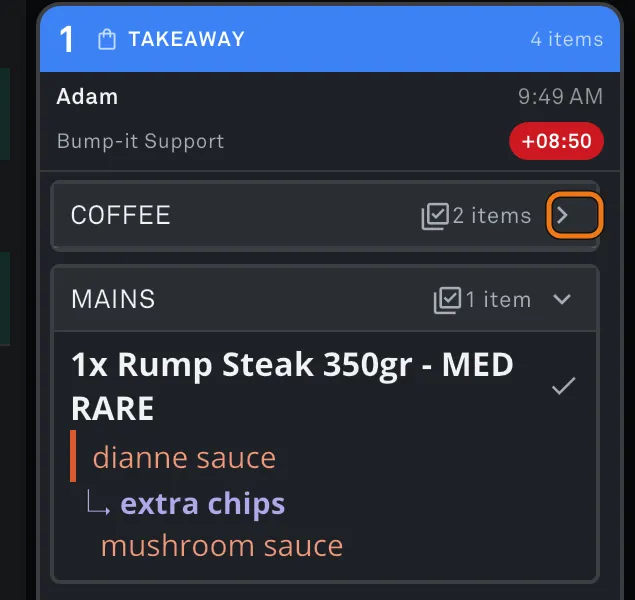
Step 5 — The chevron is circled above. Pointing right means the category is collapsed and its items are hidden; pointing down means it’s open. COFFEE is collapsed here; MAINS is still open.
Part C — Bumping
Step 6
Press an item name to bump just that item. Press it again to bring it back. Press Bump to clear the whole docket off the screen.
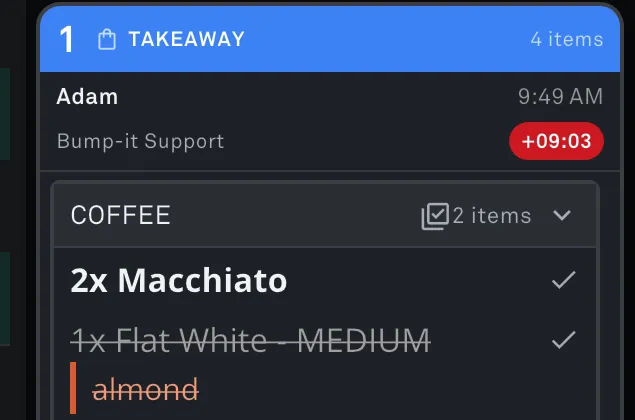
Step 6 — A bumped item is struck through.
If Bump All Button is switched on for your filter, a tick appears next to each product name. Tapping that tick bumps every unit of that item at once — so a docket with 5x Flat White clears in one motion instead of five separate taps.
Turn it on under Sites → Settings → Filters → ** your filter ** → Screen tab ** → Bump All Button**. See Guide 3, Step 3.
Step 7
Use the quick action bar at the top to show only one order type.

Step 7 — The quick action bar, set to Order Type and showing All.
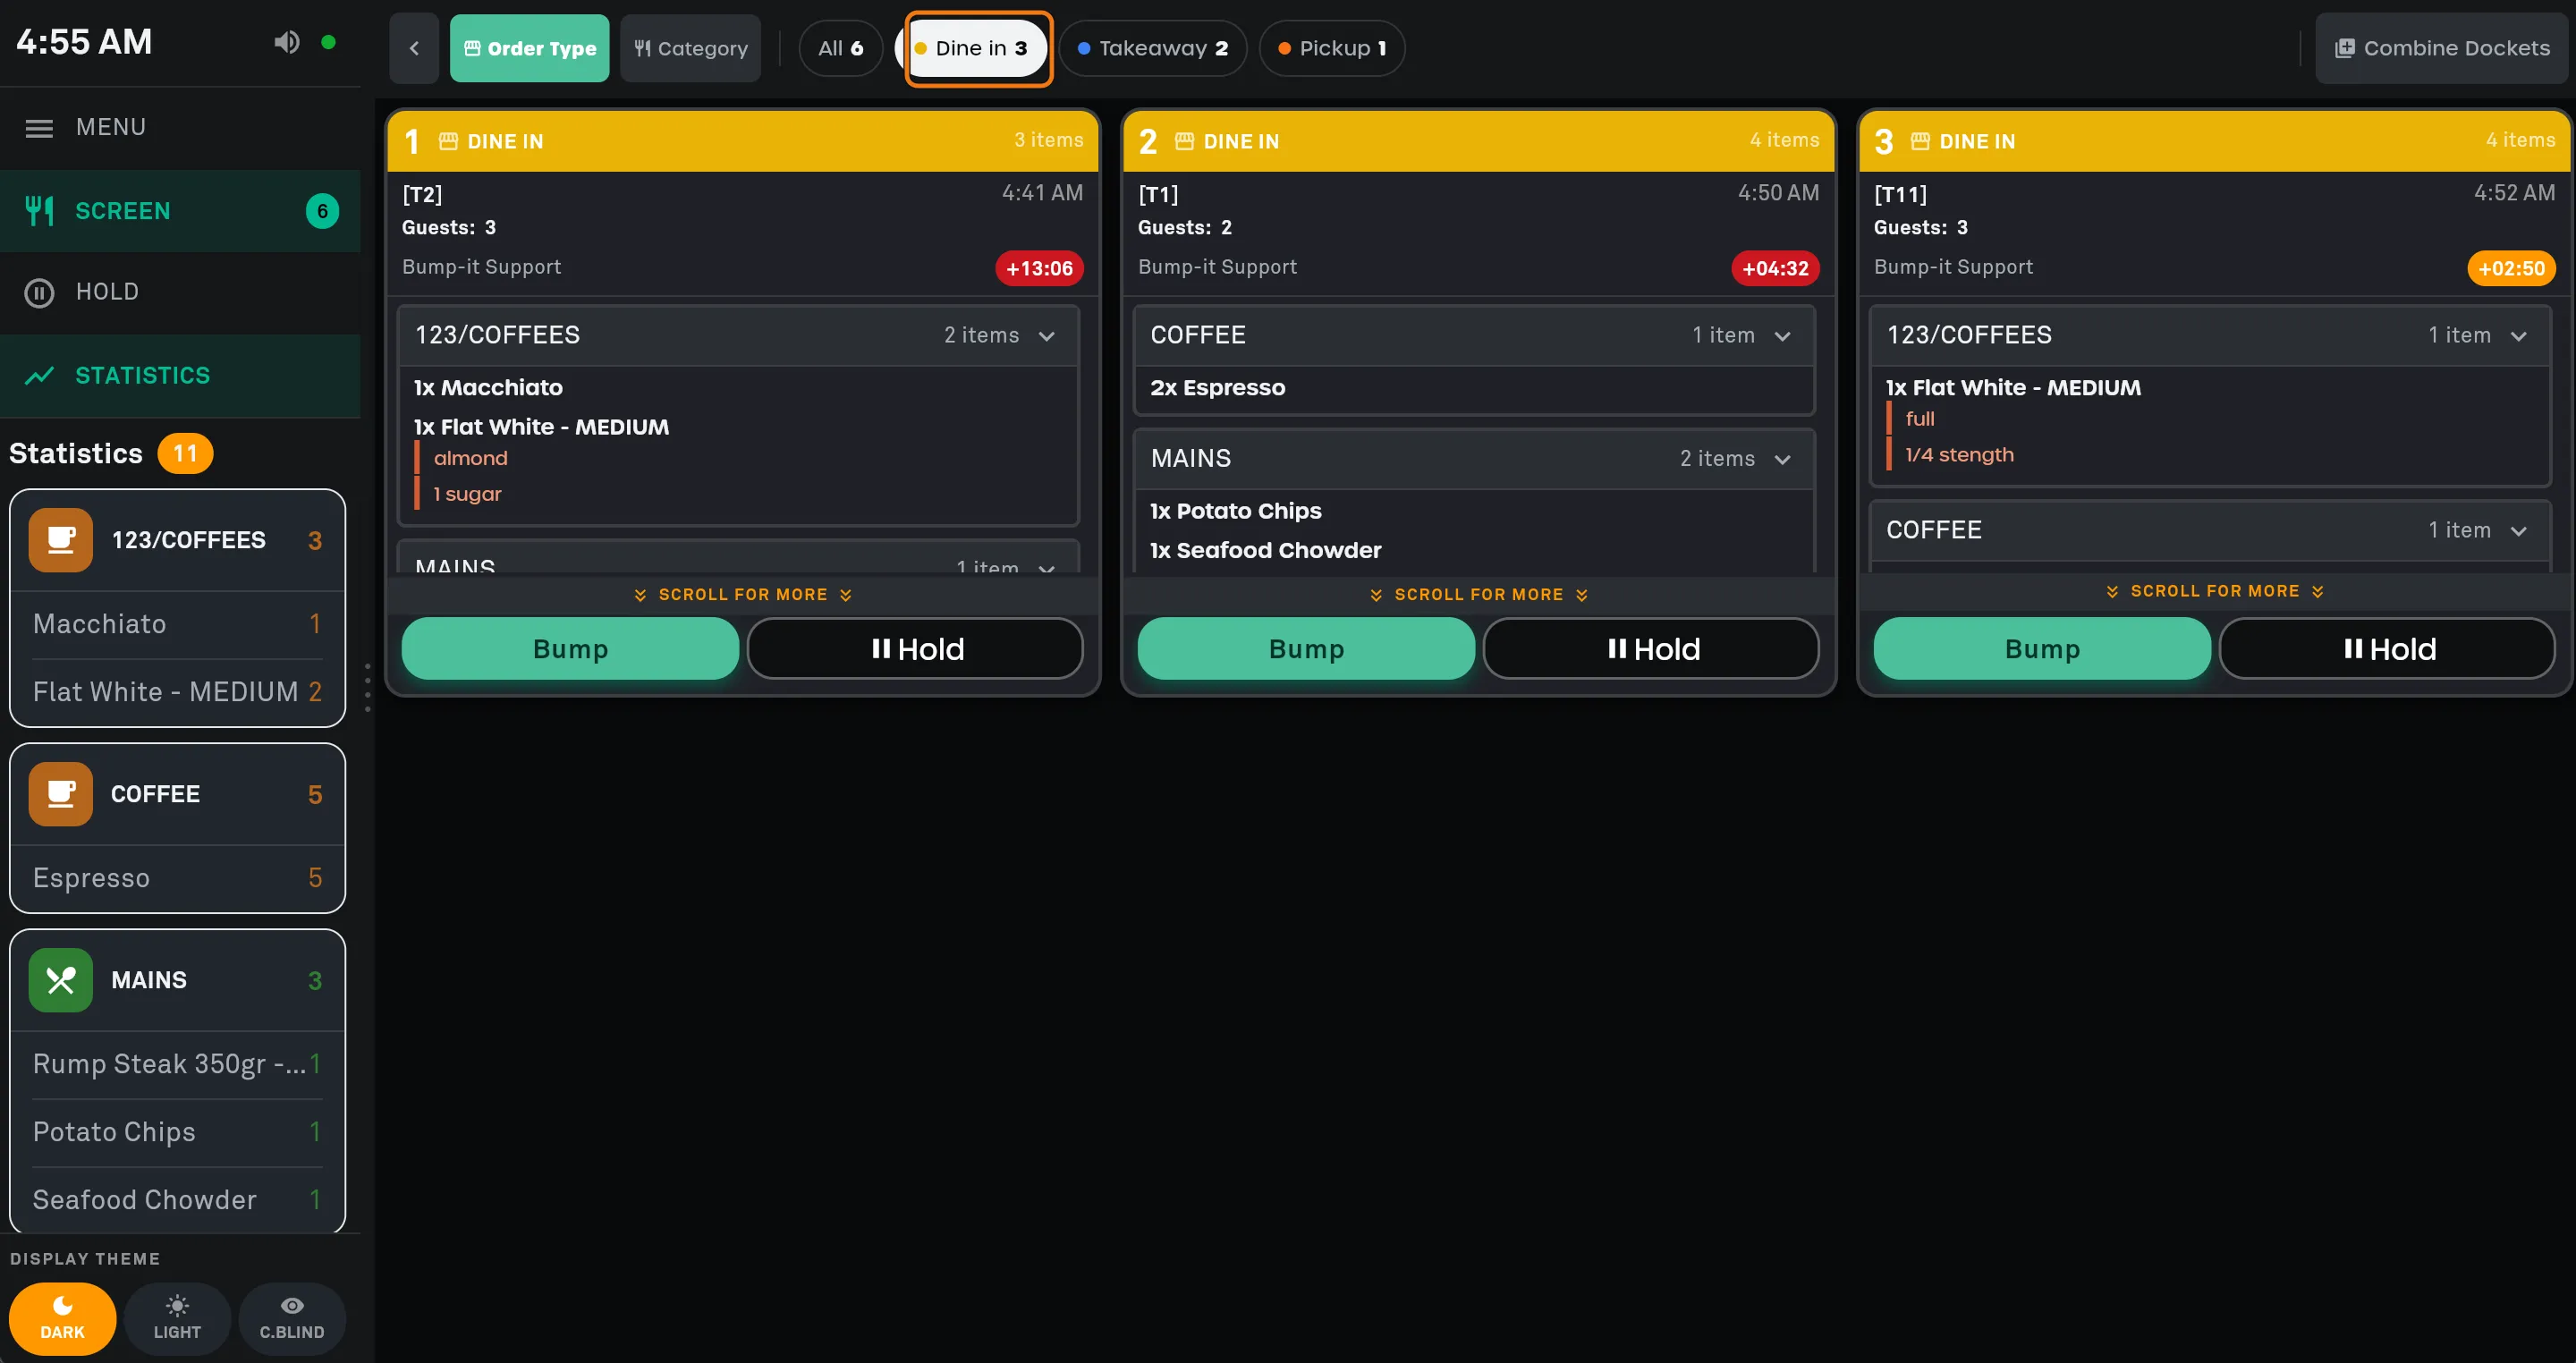
Step 7 — Pressing Dine in shows only the dine-in dockets.
Step 8
Press Category on the quick action bar to see every item assigned to that category at once.
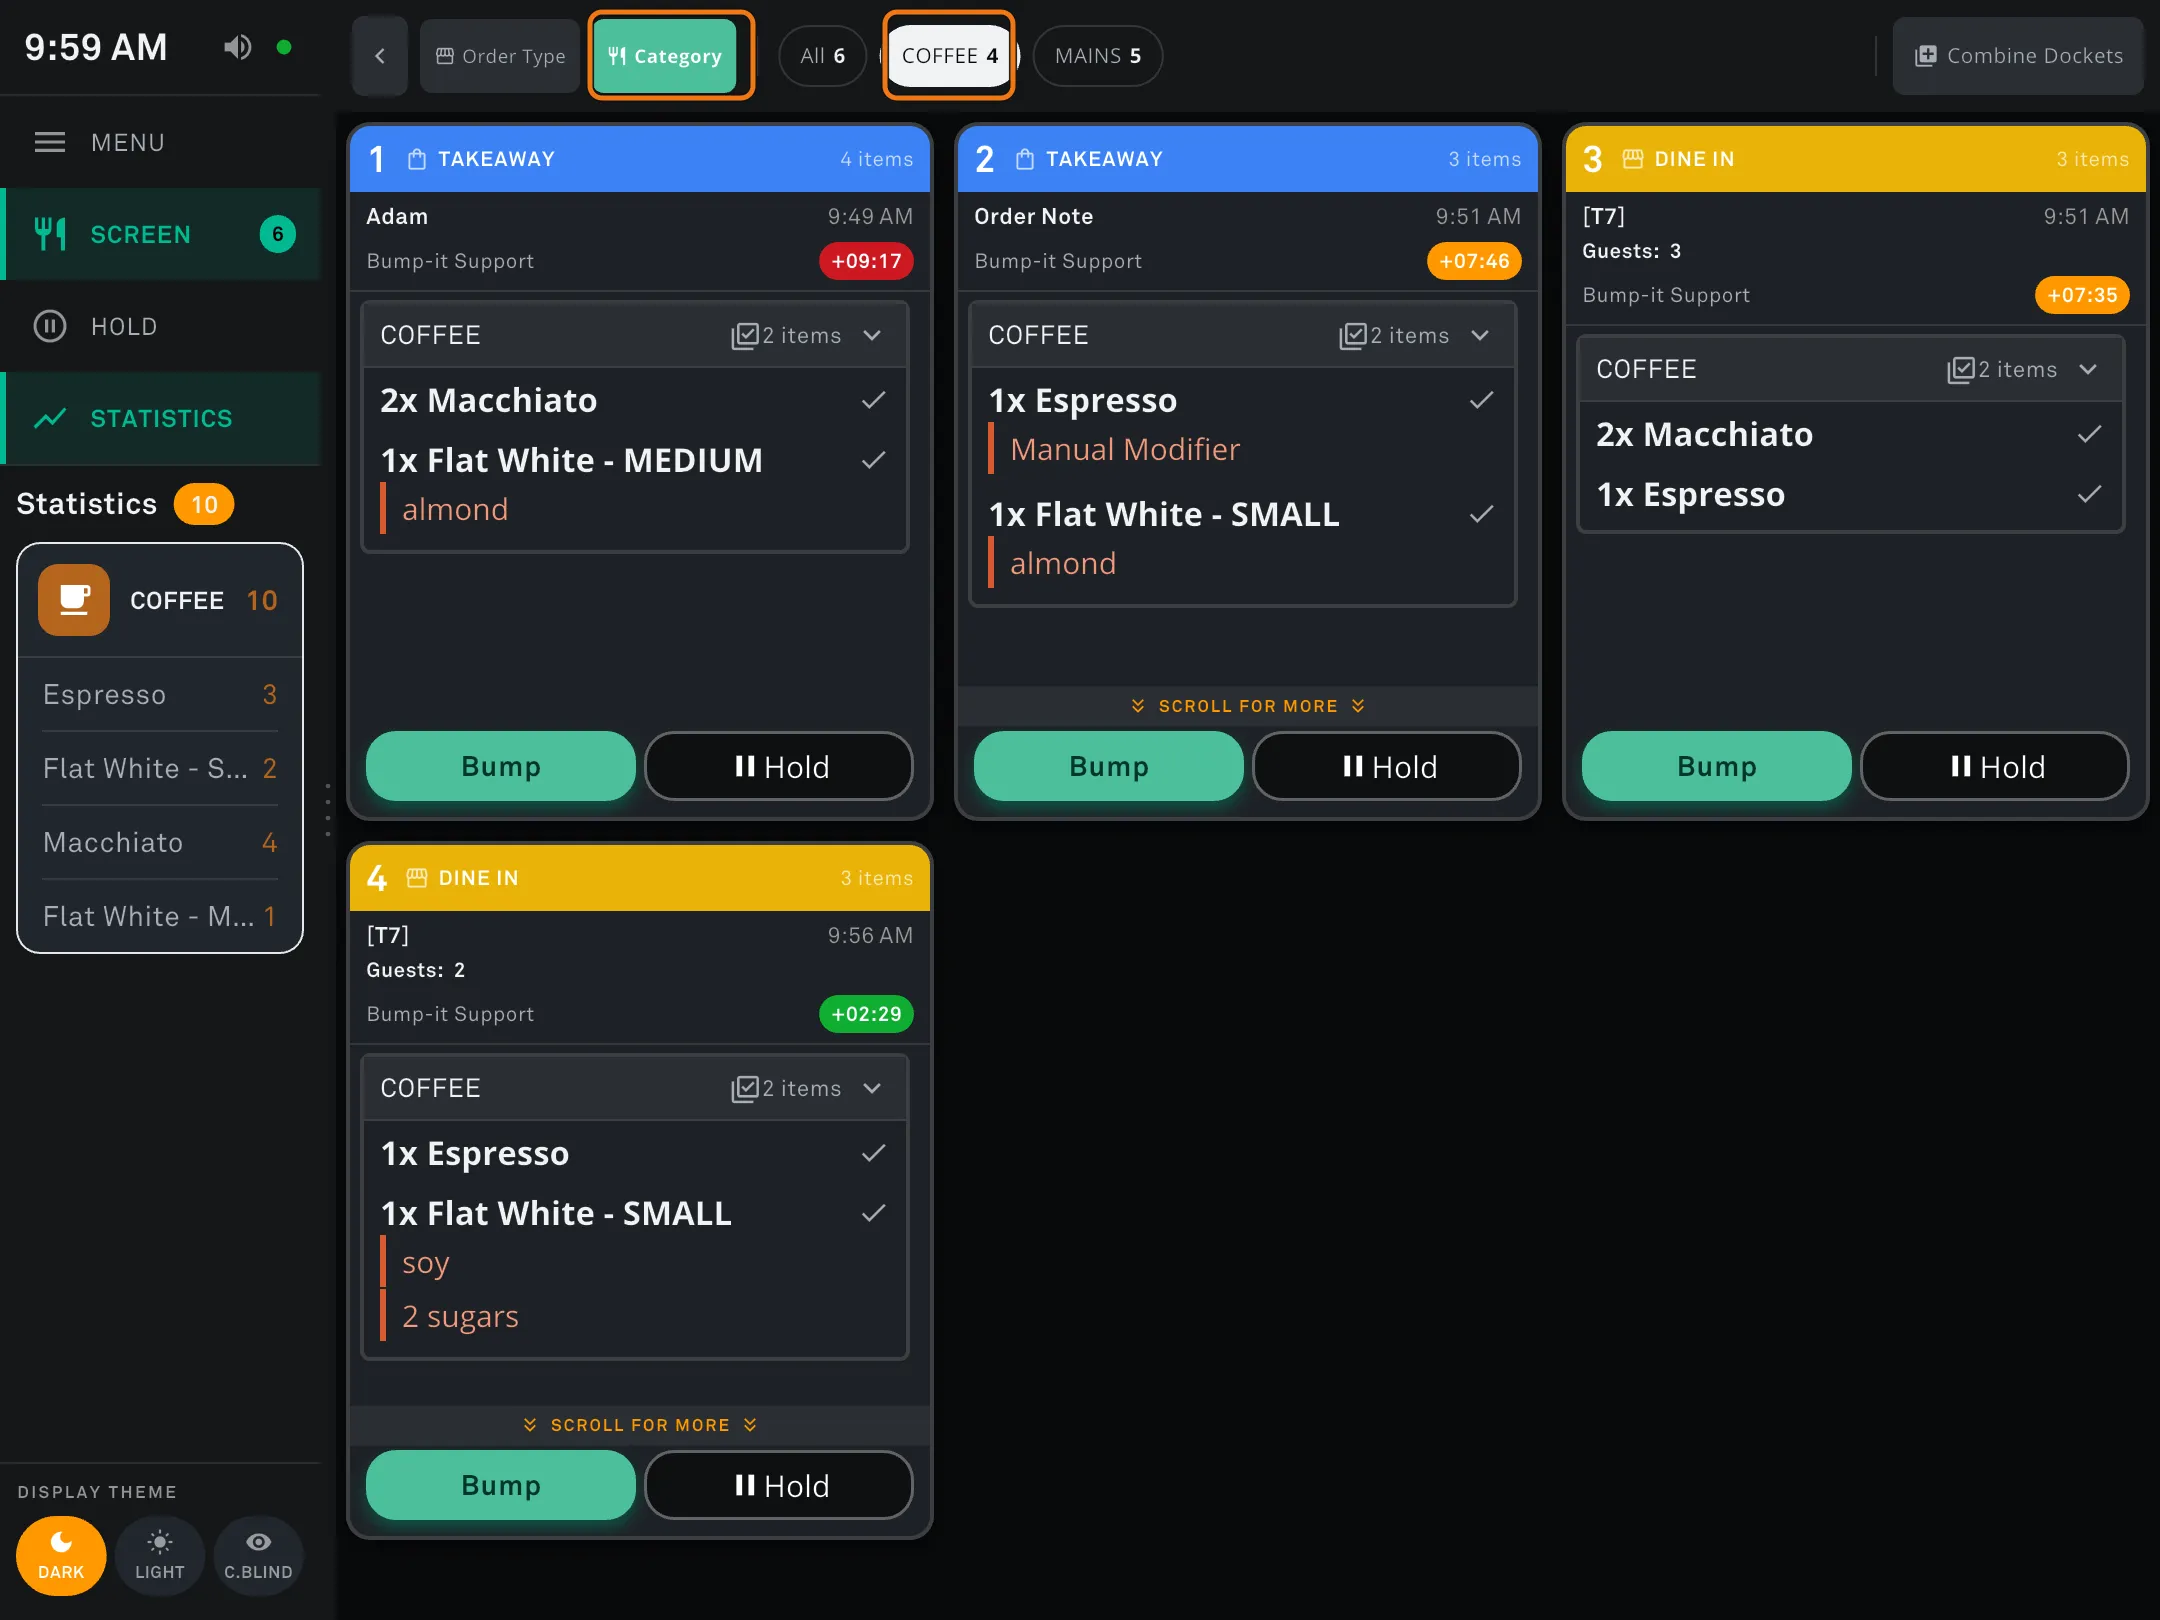
Step 8 — COFFEE is selected, so all four dockets now show only their COFFEE items. The badge beside it reads 4 — the number of dockets containing that category. The statistics sidebar drops to match: 10 items across Espresso, Flat White and Macchiato — down from 22.
This toggle shows Category or Course depending on how the filter is set up under Group products by. Whichever you group by is what appears here.
Step 9
Check the statistics sidebar on the left for your all-day count.
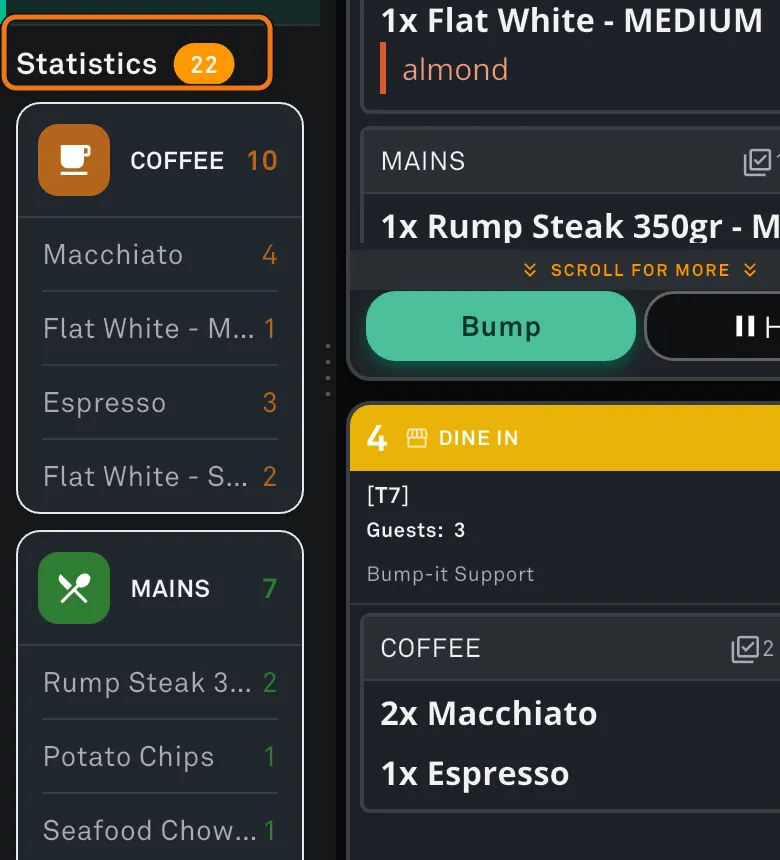
Step 9 — Statistics 22 — twenty-two items on order, grouped by category with a per-product breakdown.
Step 10
As you bump items, the statistics count drops automatically.
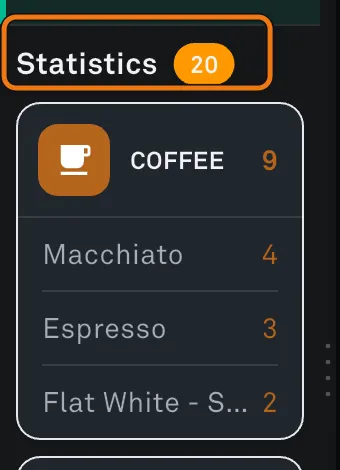
Step 10 — Bumping a Flat White immediately reduces its count in the sidebar.
Step 11
You can scroll up and down within a docket to see more of it. If it says SCROLL FOR MORE, tap the top of the docket to expand it into the right-hand sidebar instead.
Tap another docket to swap what’s shown there, or press X to close it.
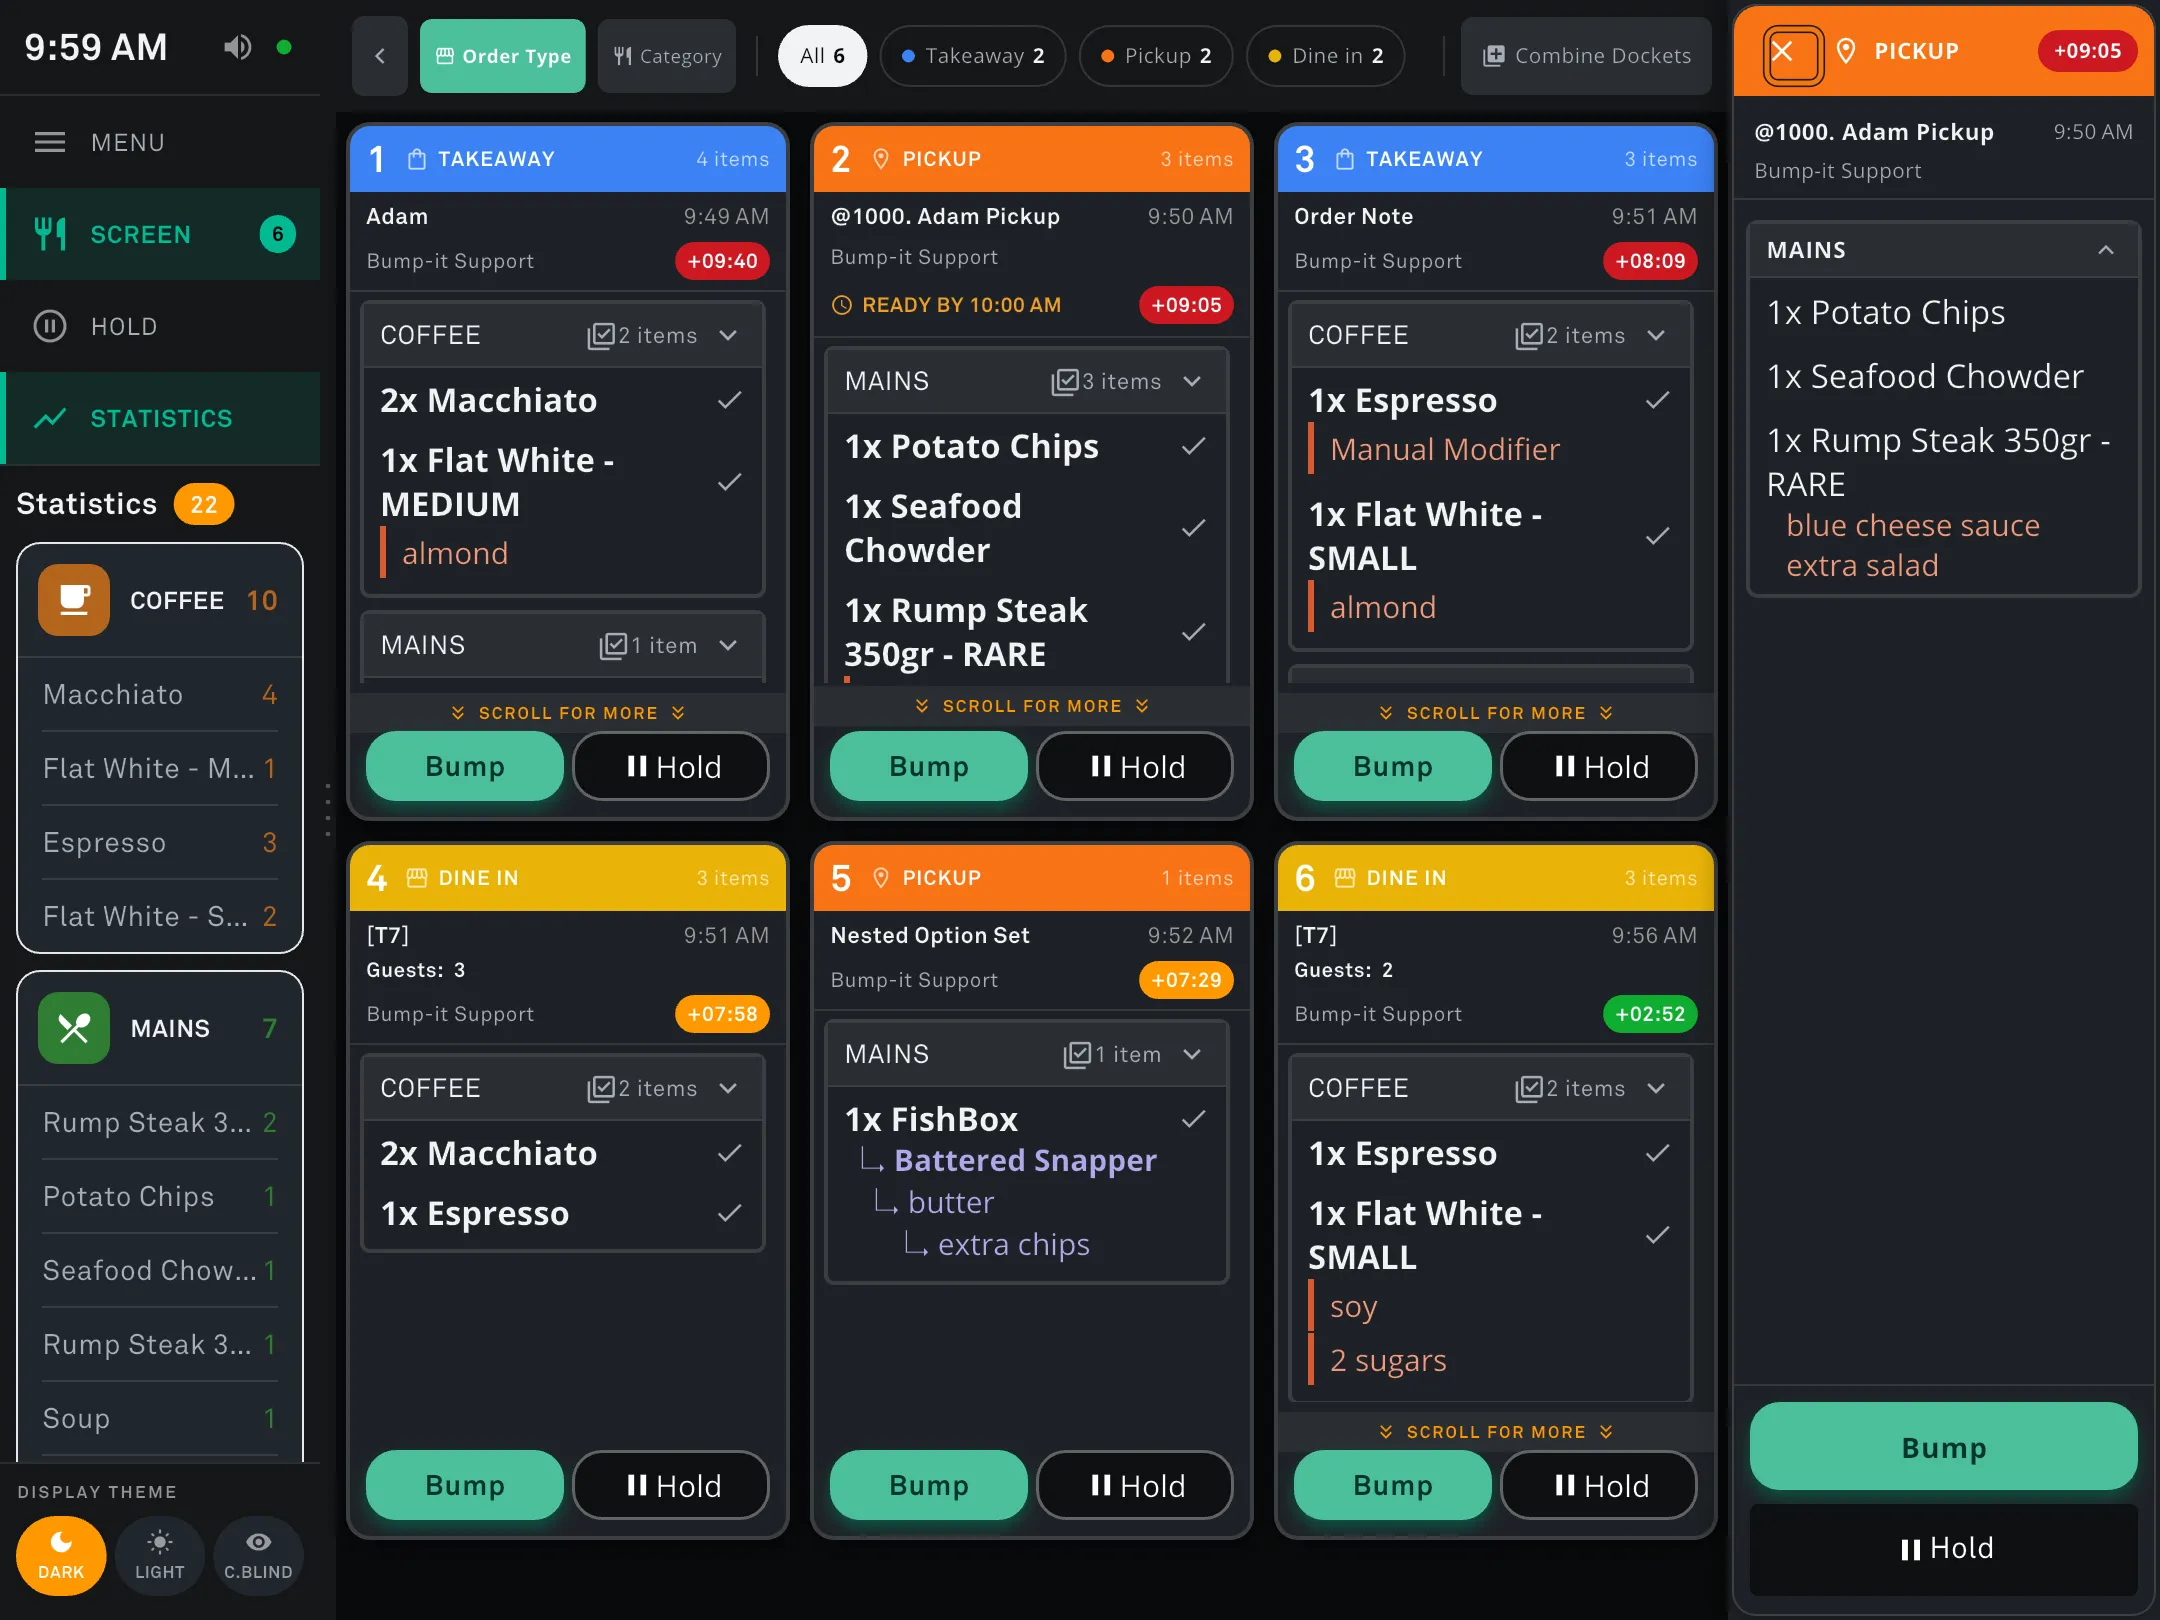
Step 11 — The full docket opens on the right while you keep working in the main area.
Part D — Undo a bump
Step 12
Bumped something by mistake? Open MENU in the left sidebar.
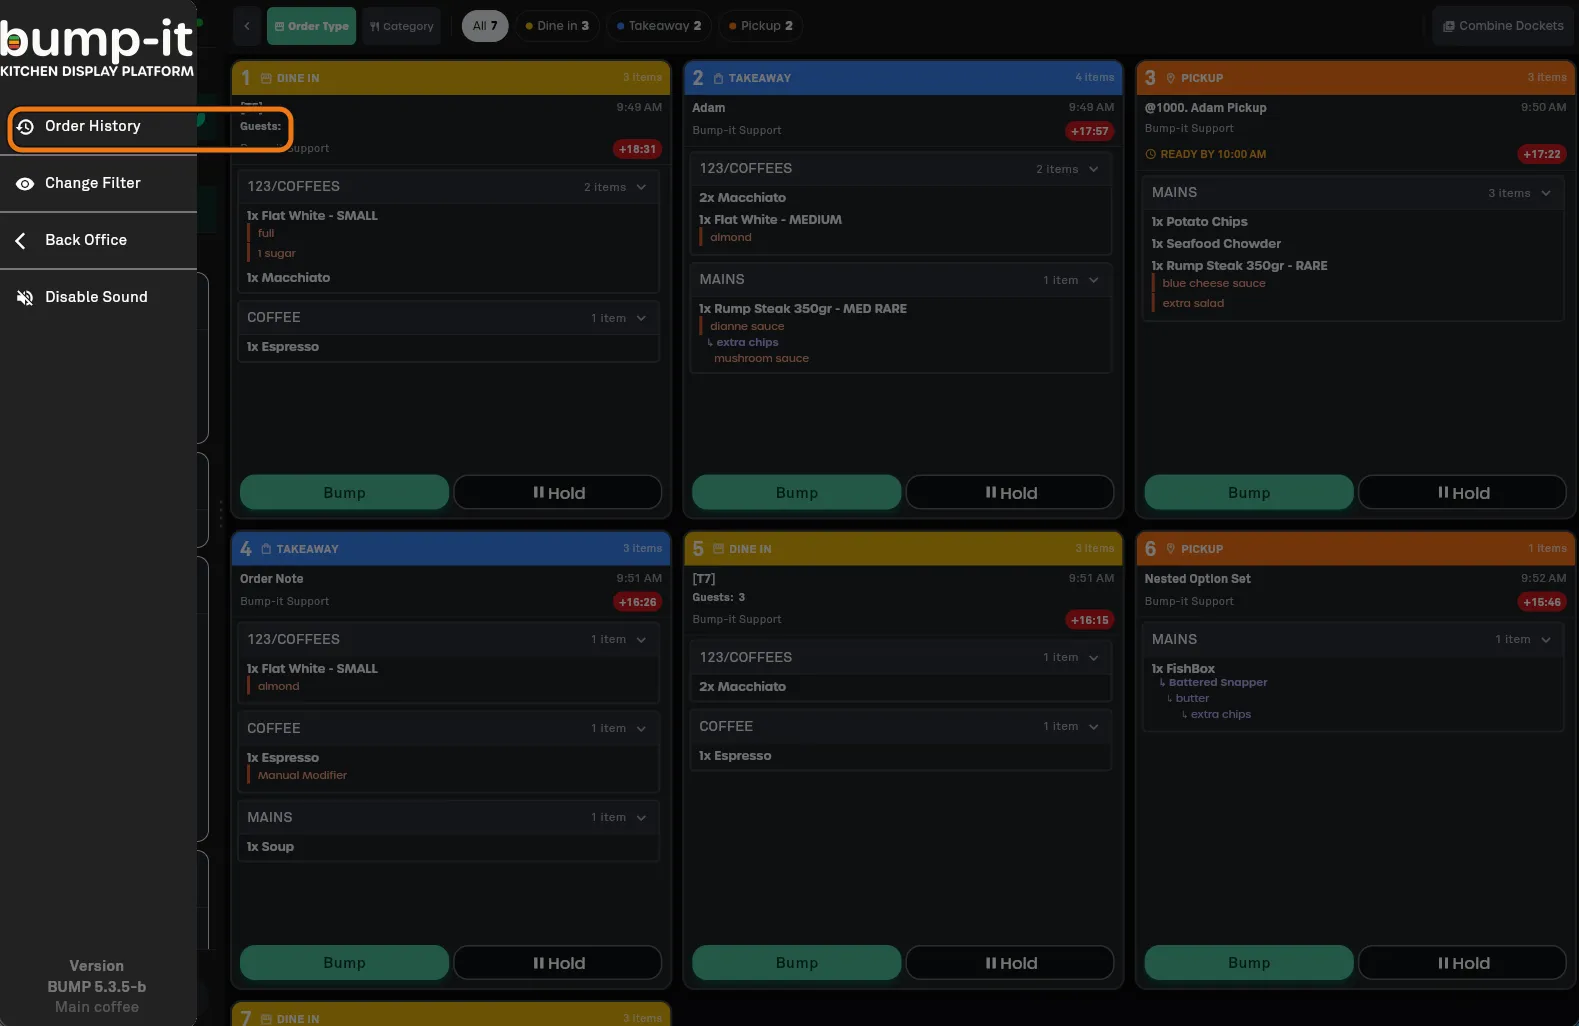
Step 12 — MENU contains Order History (circled above) · Change Filter · Back Office · Disable Sound.
Step 13
Go to Order History and find the order.
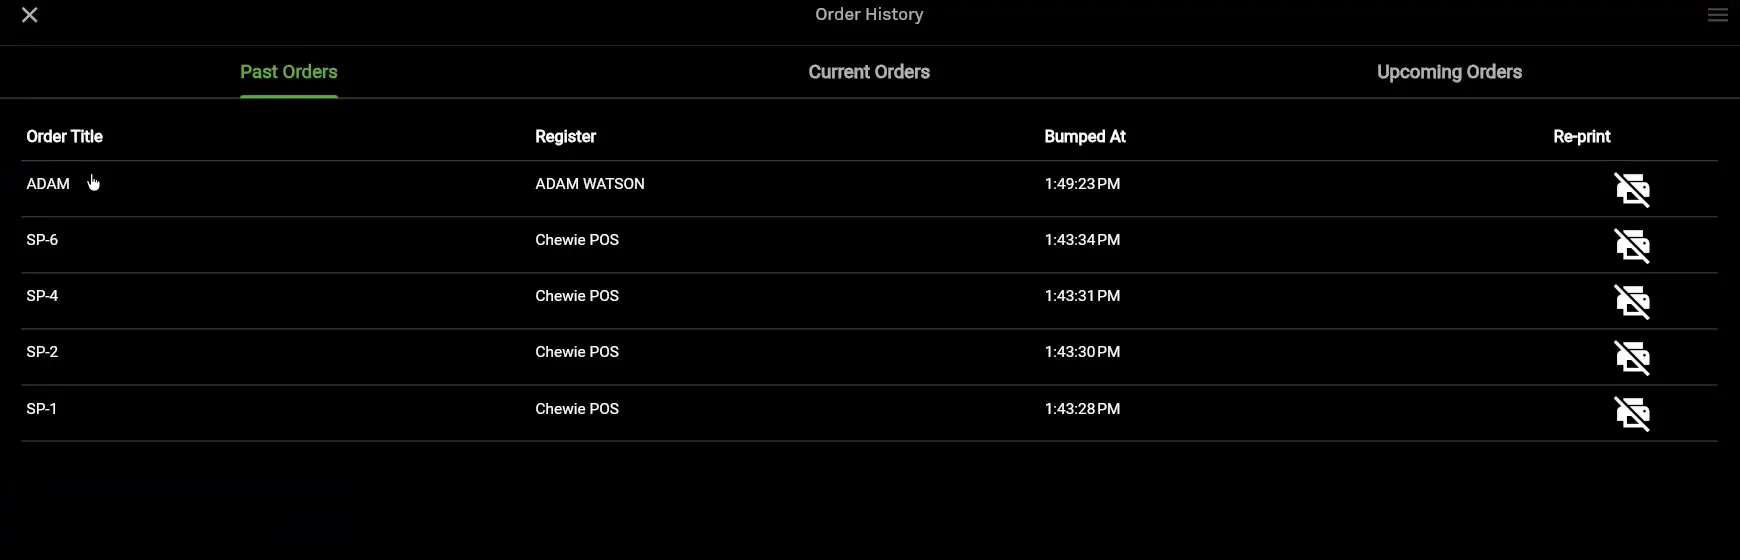
Step 13 — Tabs for Past Orders · Current Orders · Upcoming Orders. Columns: Order Title, Register, Bumped At, Re-print.
Step 14
Tap the order, then press the red Unbump button.
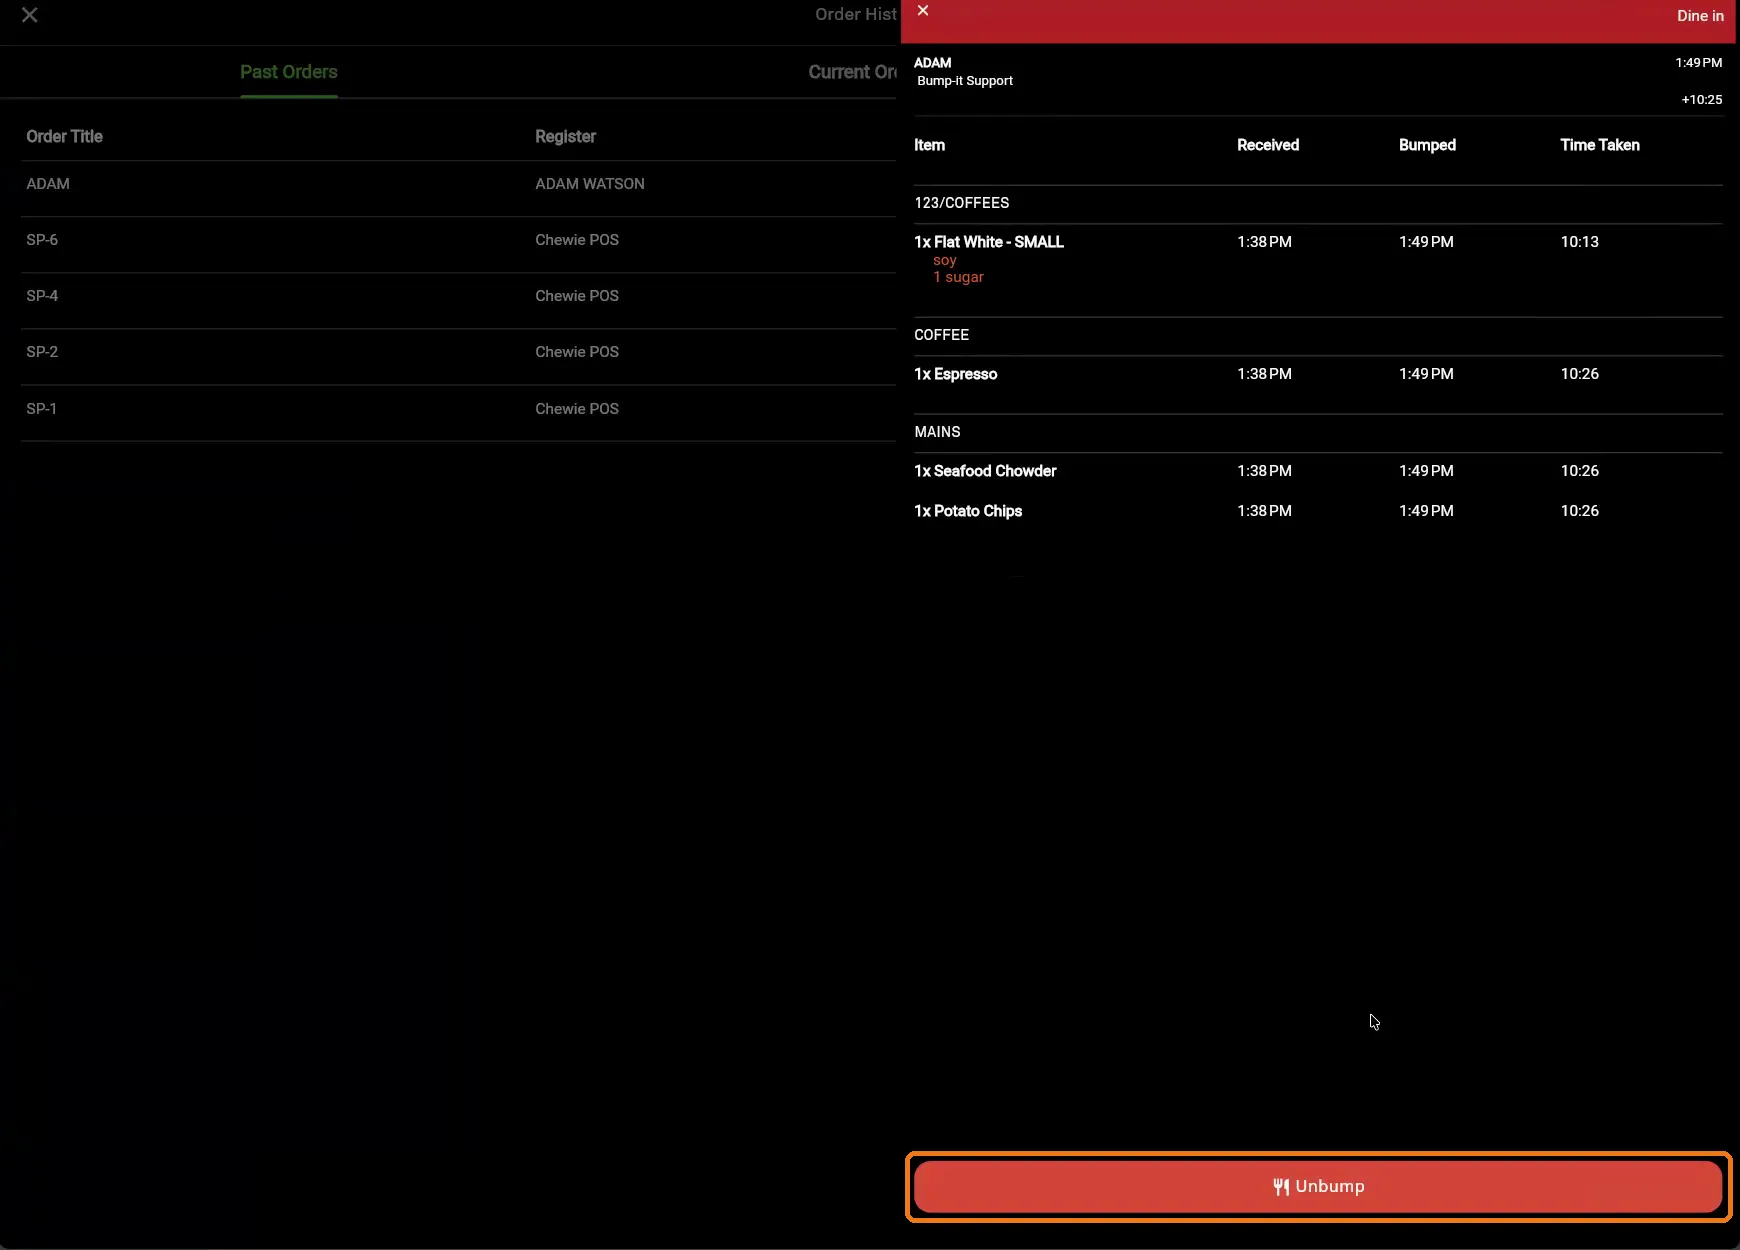
Step 14 — The order detail shows Item, Received, Bumped and Time Taken, with Unbump at the bottom.
The docket returns to the exact position it was in when it was bumped, based on its timestamp.
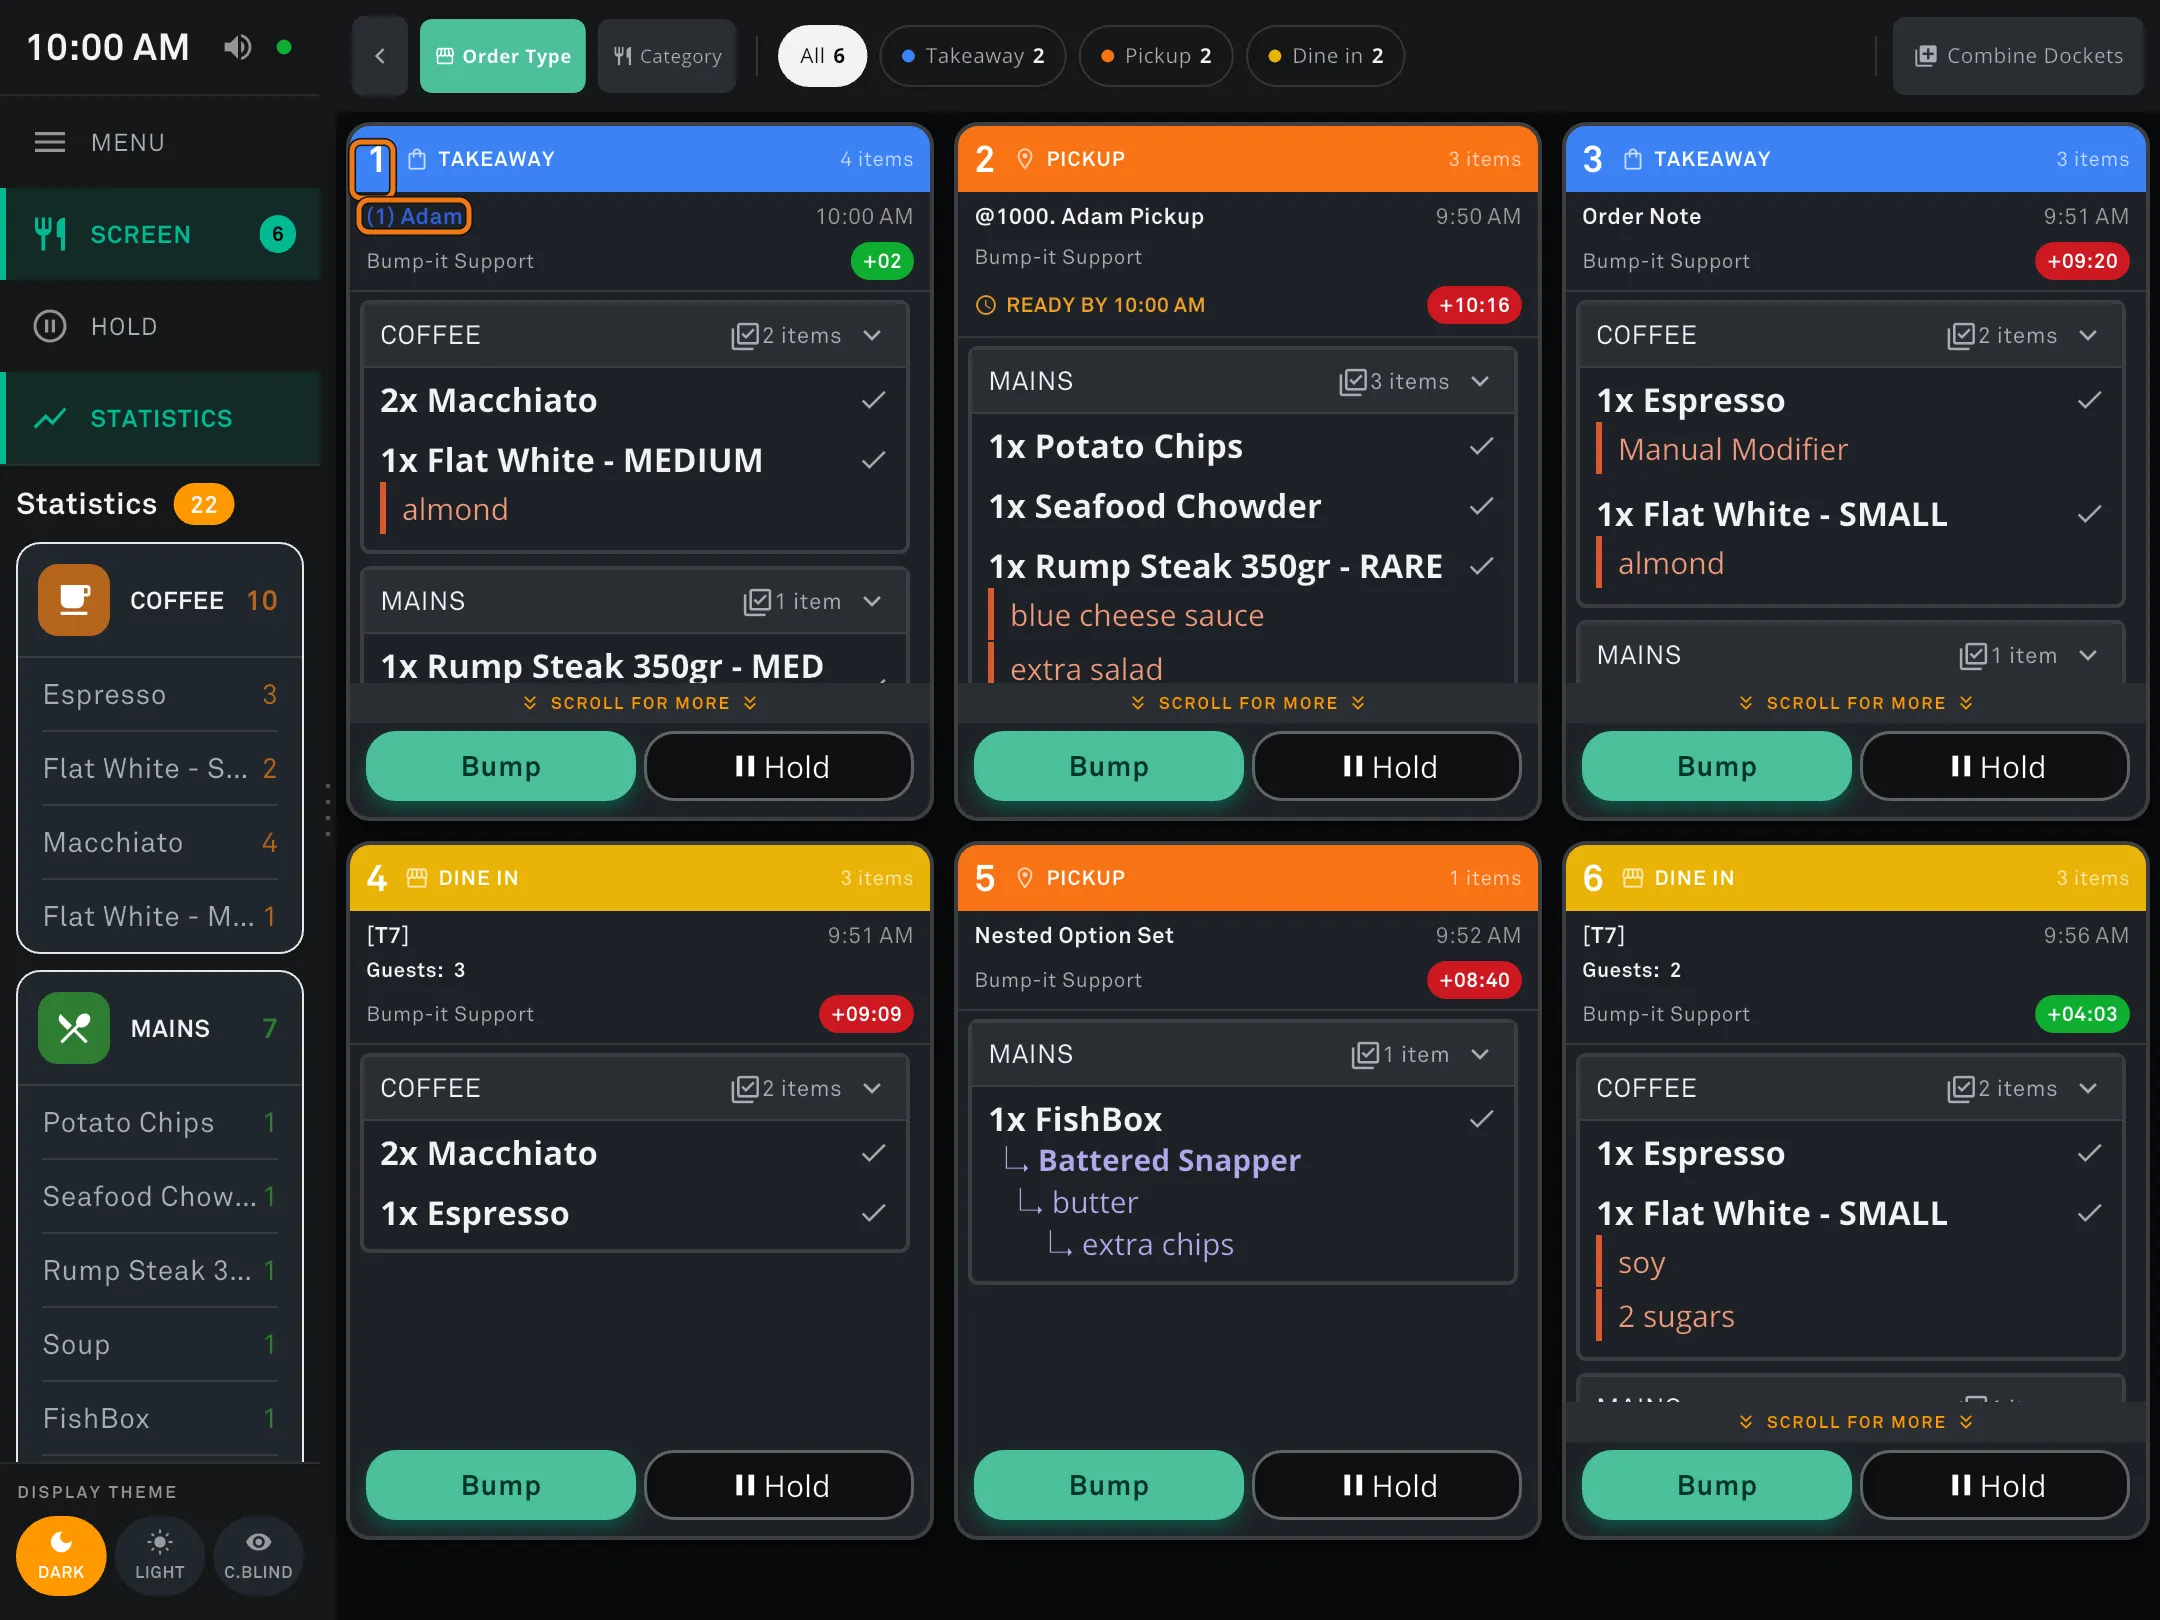
Step 14 — The docket is back in its original position.
Unbump only works if Can Undo is ticked on this device. See Guide 2, Step 3.
Part E — Combine dockets
Step 15
Press Combine Dockets at the top right, then tap the dockets you want to join. Press Combine and they merge into one docket, keeping every item from both. Made a mistake? Press Undo to separate them again, or the X to leave combine mode without joining anything.
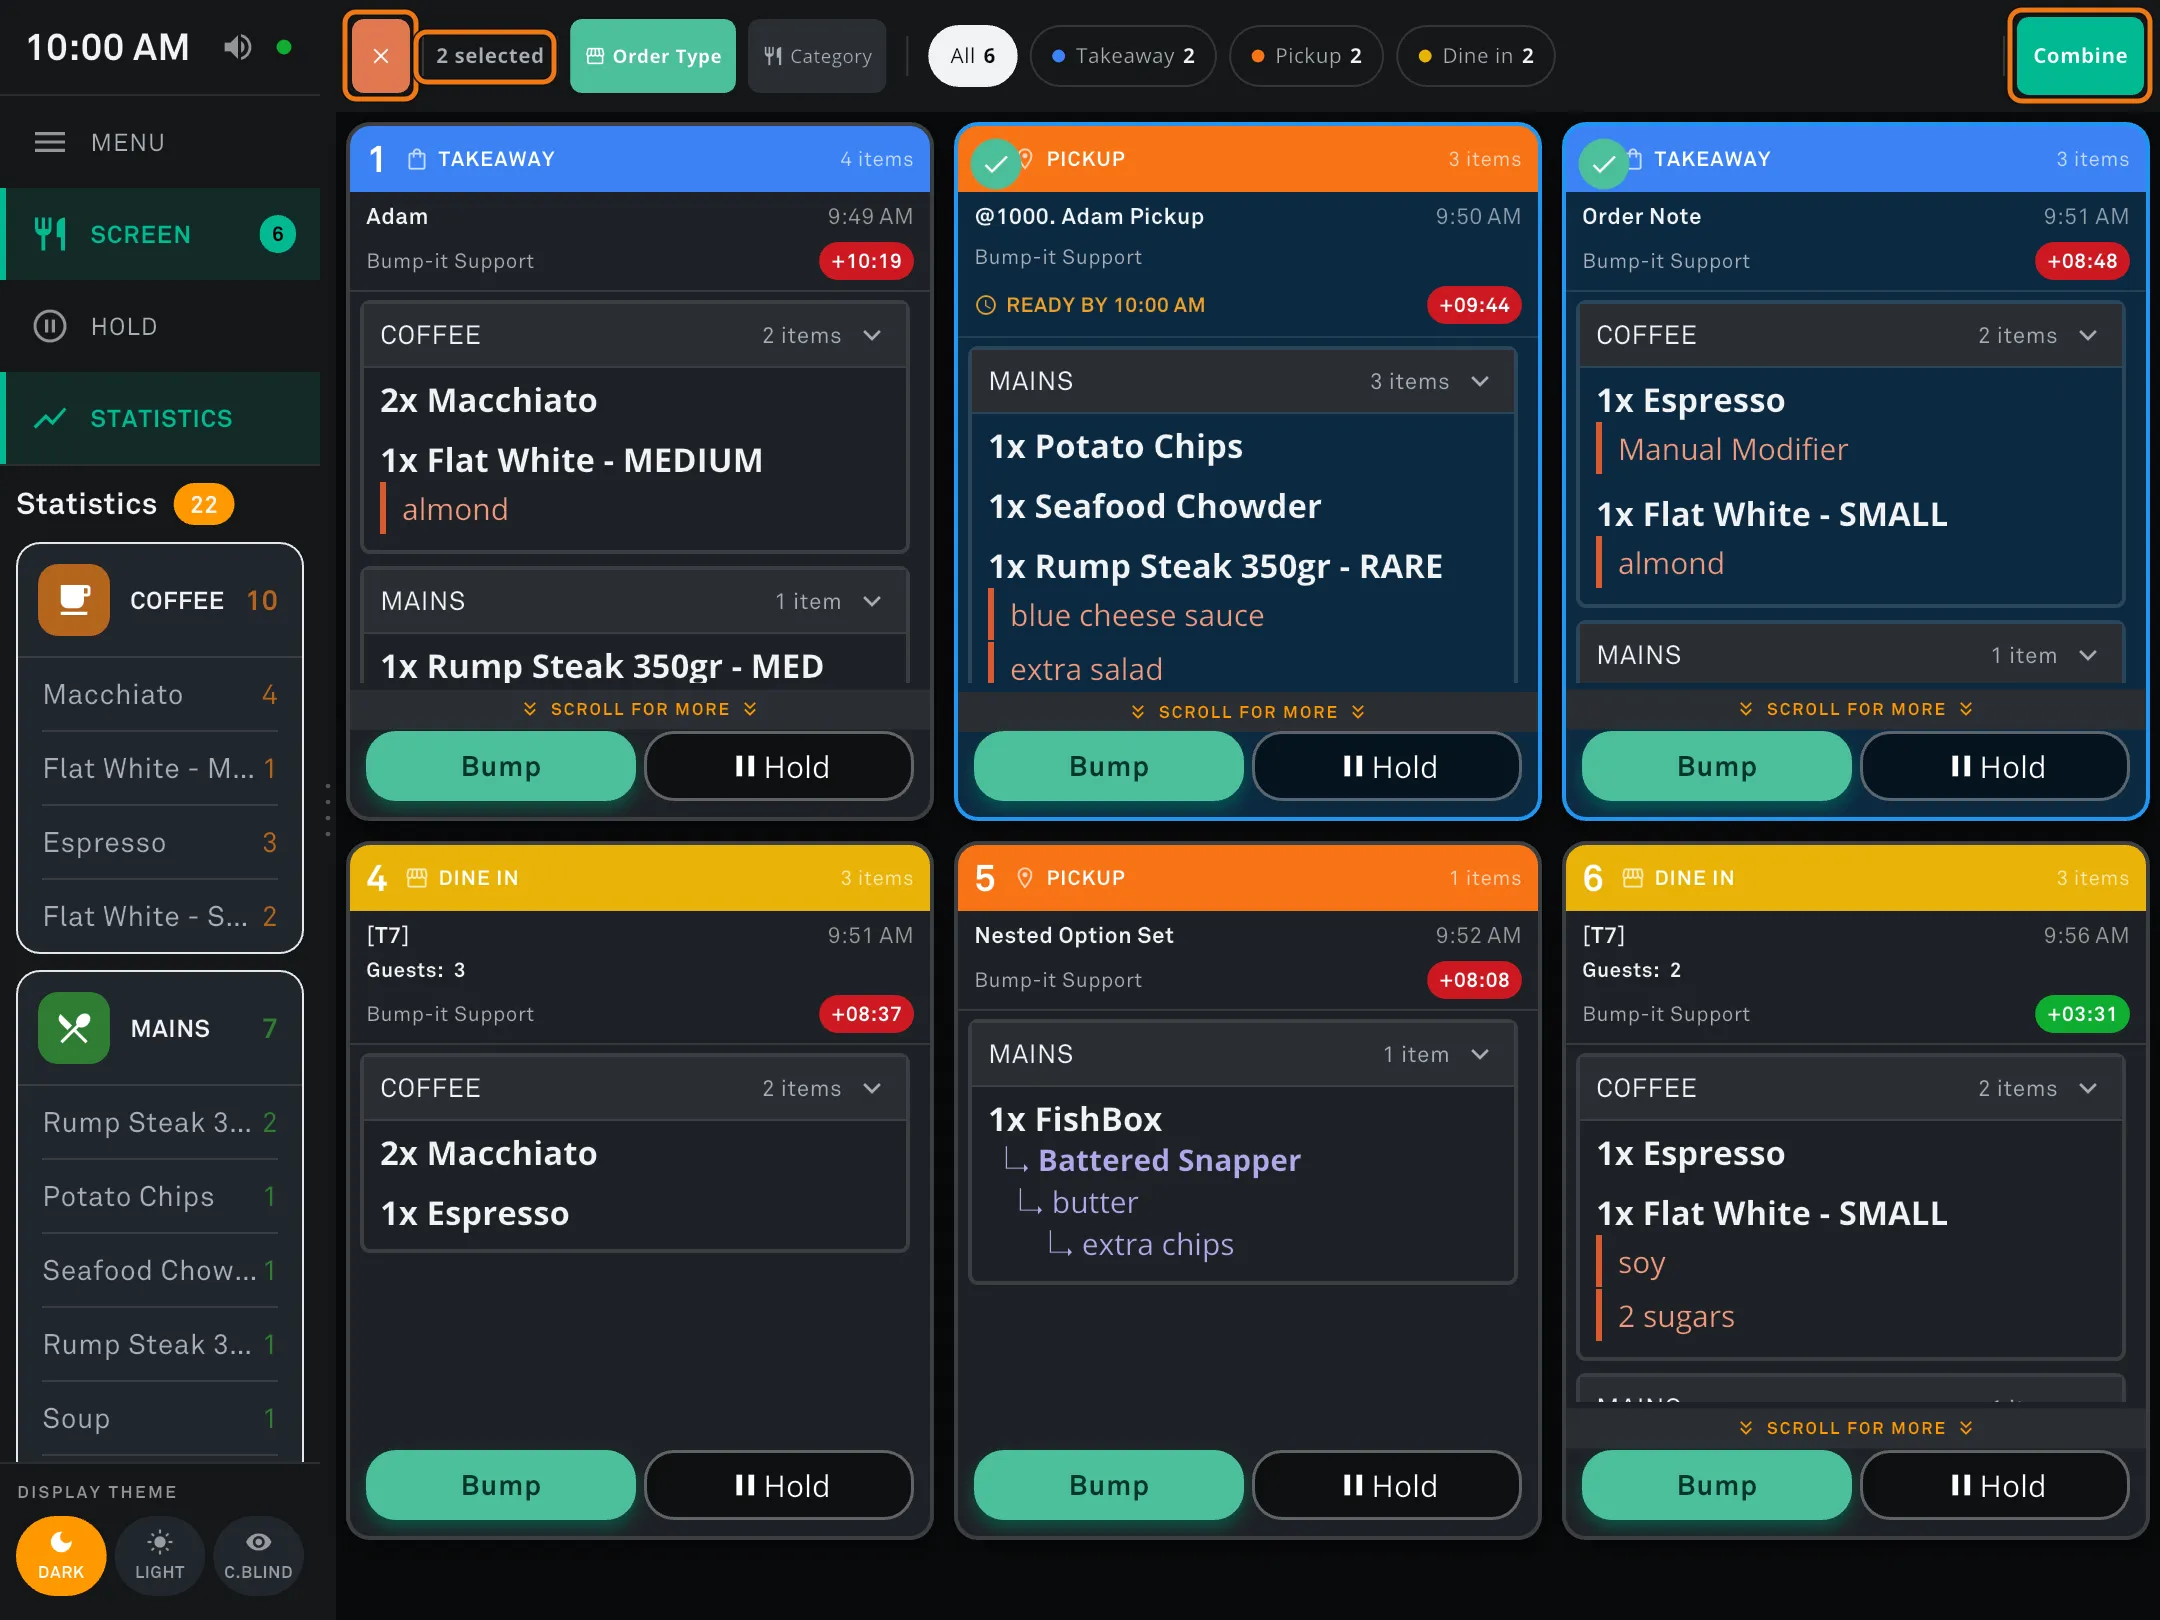
Step 15 — Selected dockets highlight. The header shows 2 selected, with Combine on the right and an X on the left to back out.
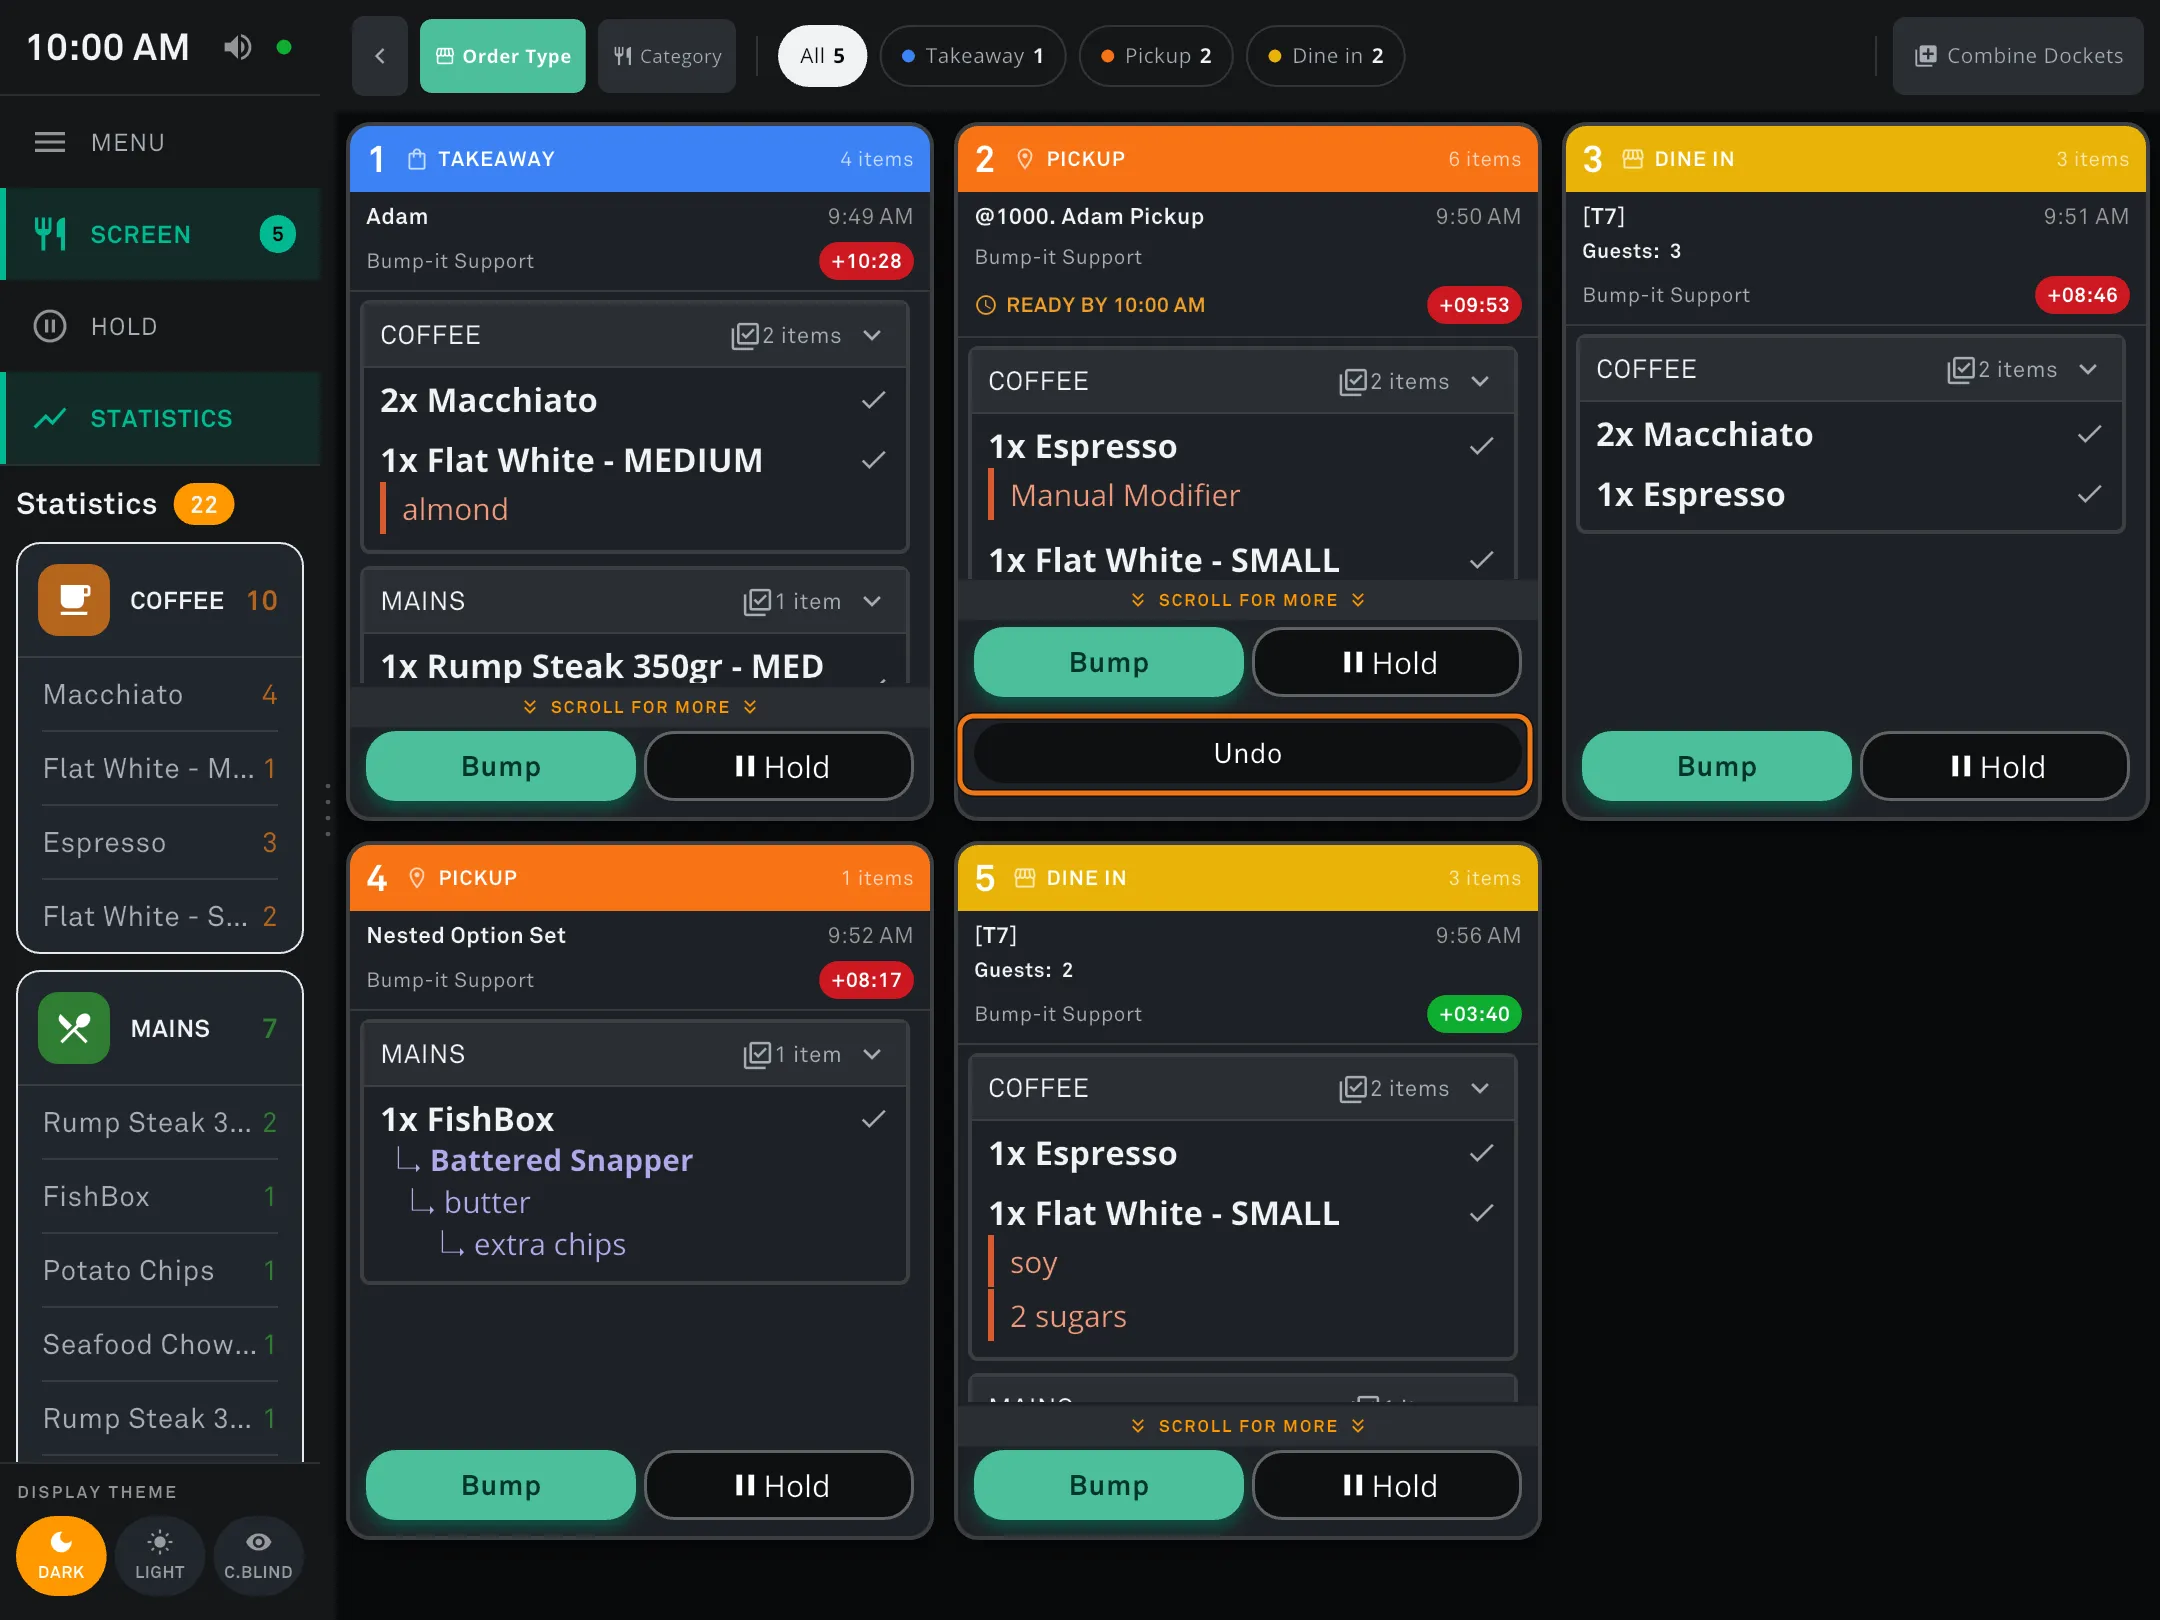
Step 15 — The two dockets have merged into one, keeping every item from both. Undo is circled — press it to separate them again.
Part F — Hold a docket
Step 16
Press Hold instead of Bump to take a docket off the main screen without clearing it — it moves to the HOLD section in the left sidebar. Press Unhold to bring it back: it returns to position 1 because it needs making now, the order note turns blue with a bracketed count of how many times it’s been held, and the timer restarts in green. Hold it again and that count goes up.
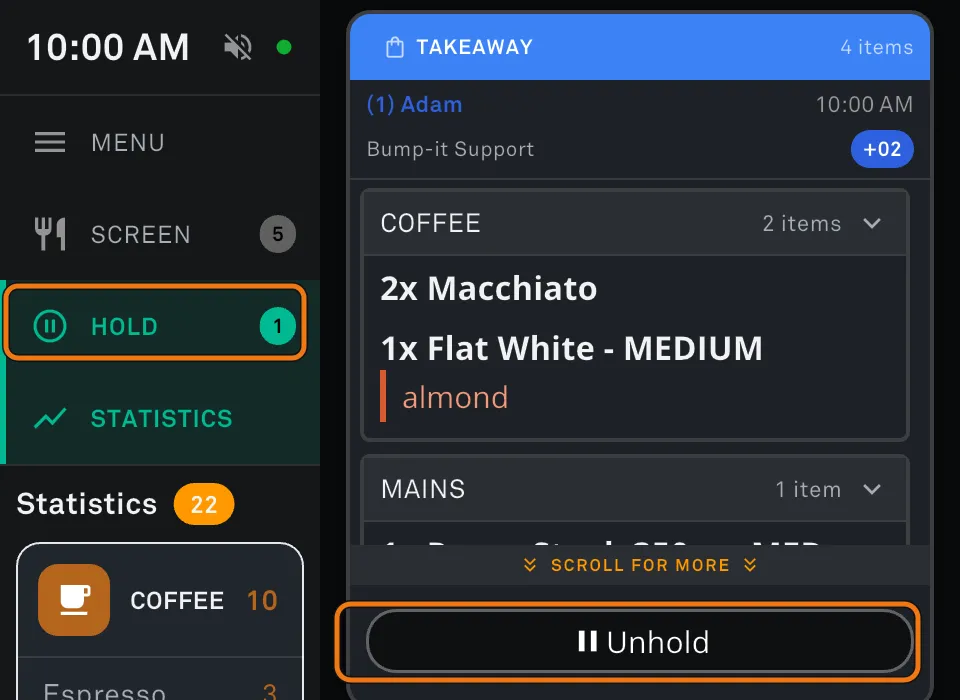
Step 16 — The HOLD tab (circled above) with its count, and the held docket’s Unhold button.
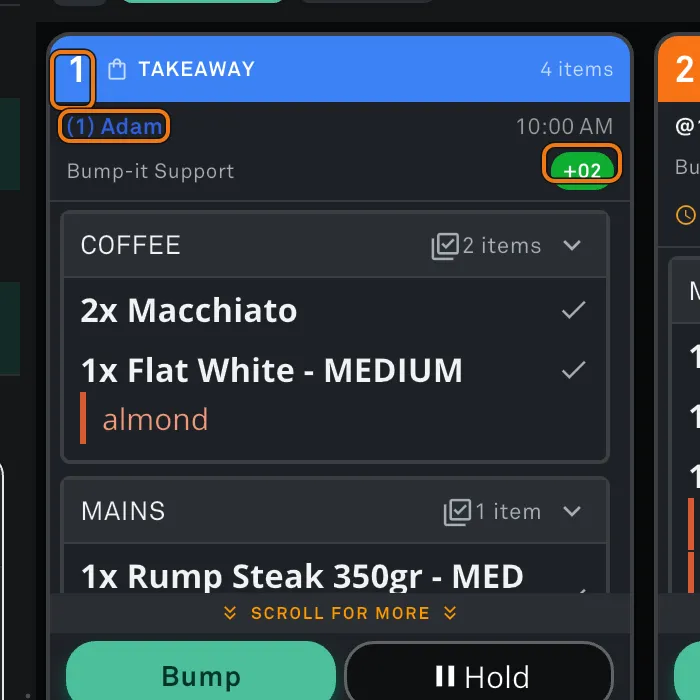
Step 16 — Back on the SCREEN tab after unholding. The docket is at position 1, the order note is blue with (1) in front of it — the number of times it has been held — and the timer badge is green again.
Part G — Display themes
Step 17
Switch theme from the bottom of the left sidebar. There are three: DARK (the default, used throughout this guide), LIGHT (a white background for bright rooms) and C.BLIND.
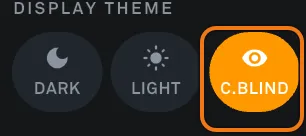
Step 17 — The DISPLAY THEME switcher, with C.BLIND selected.
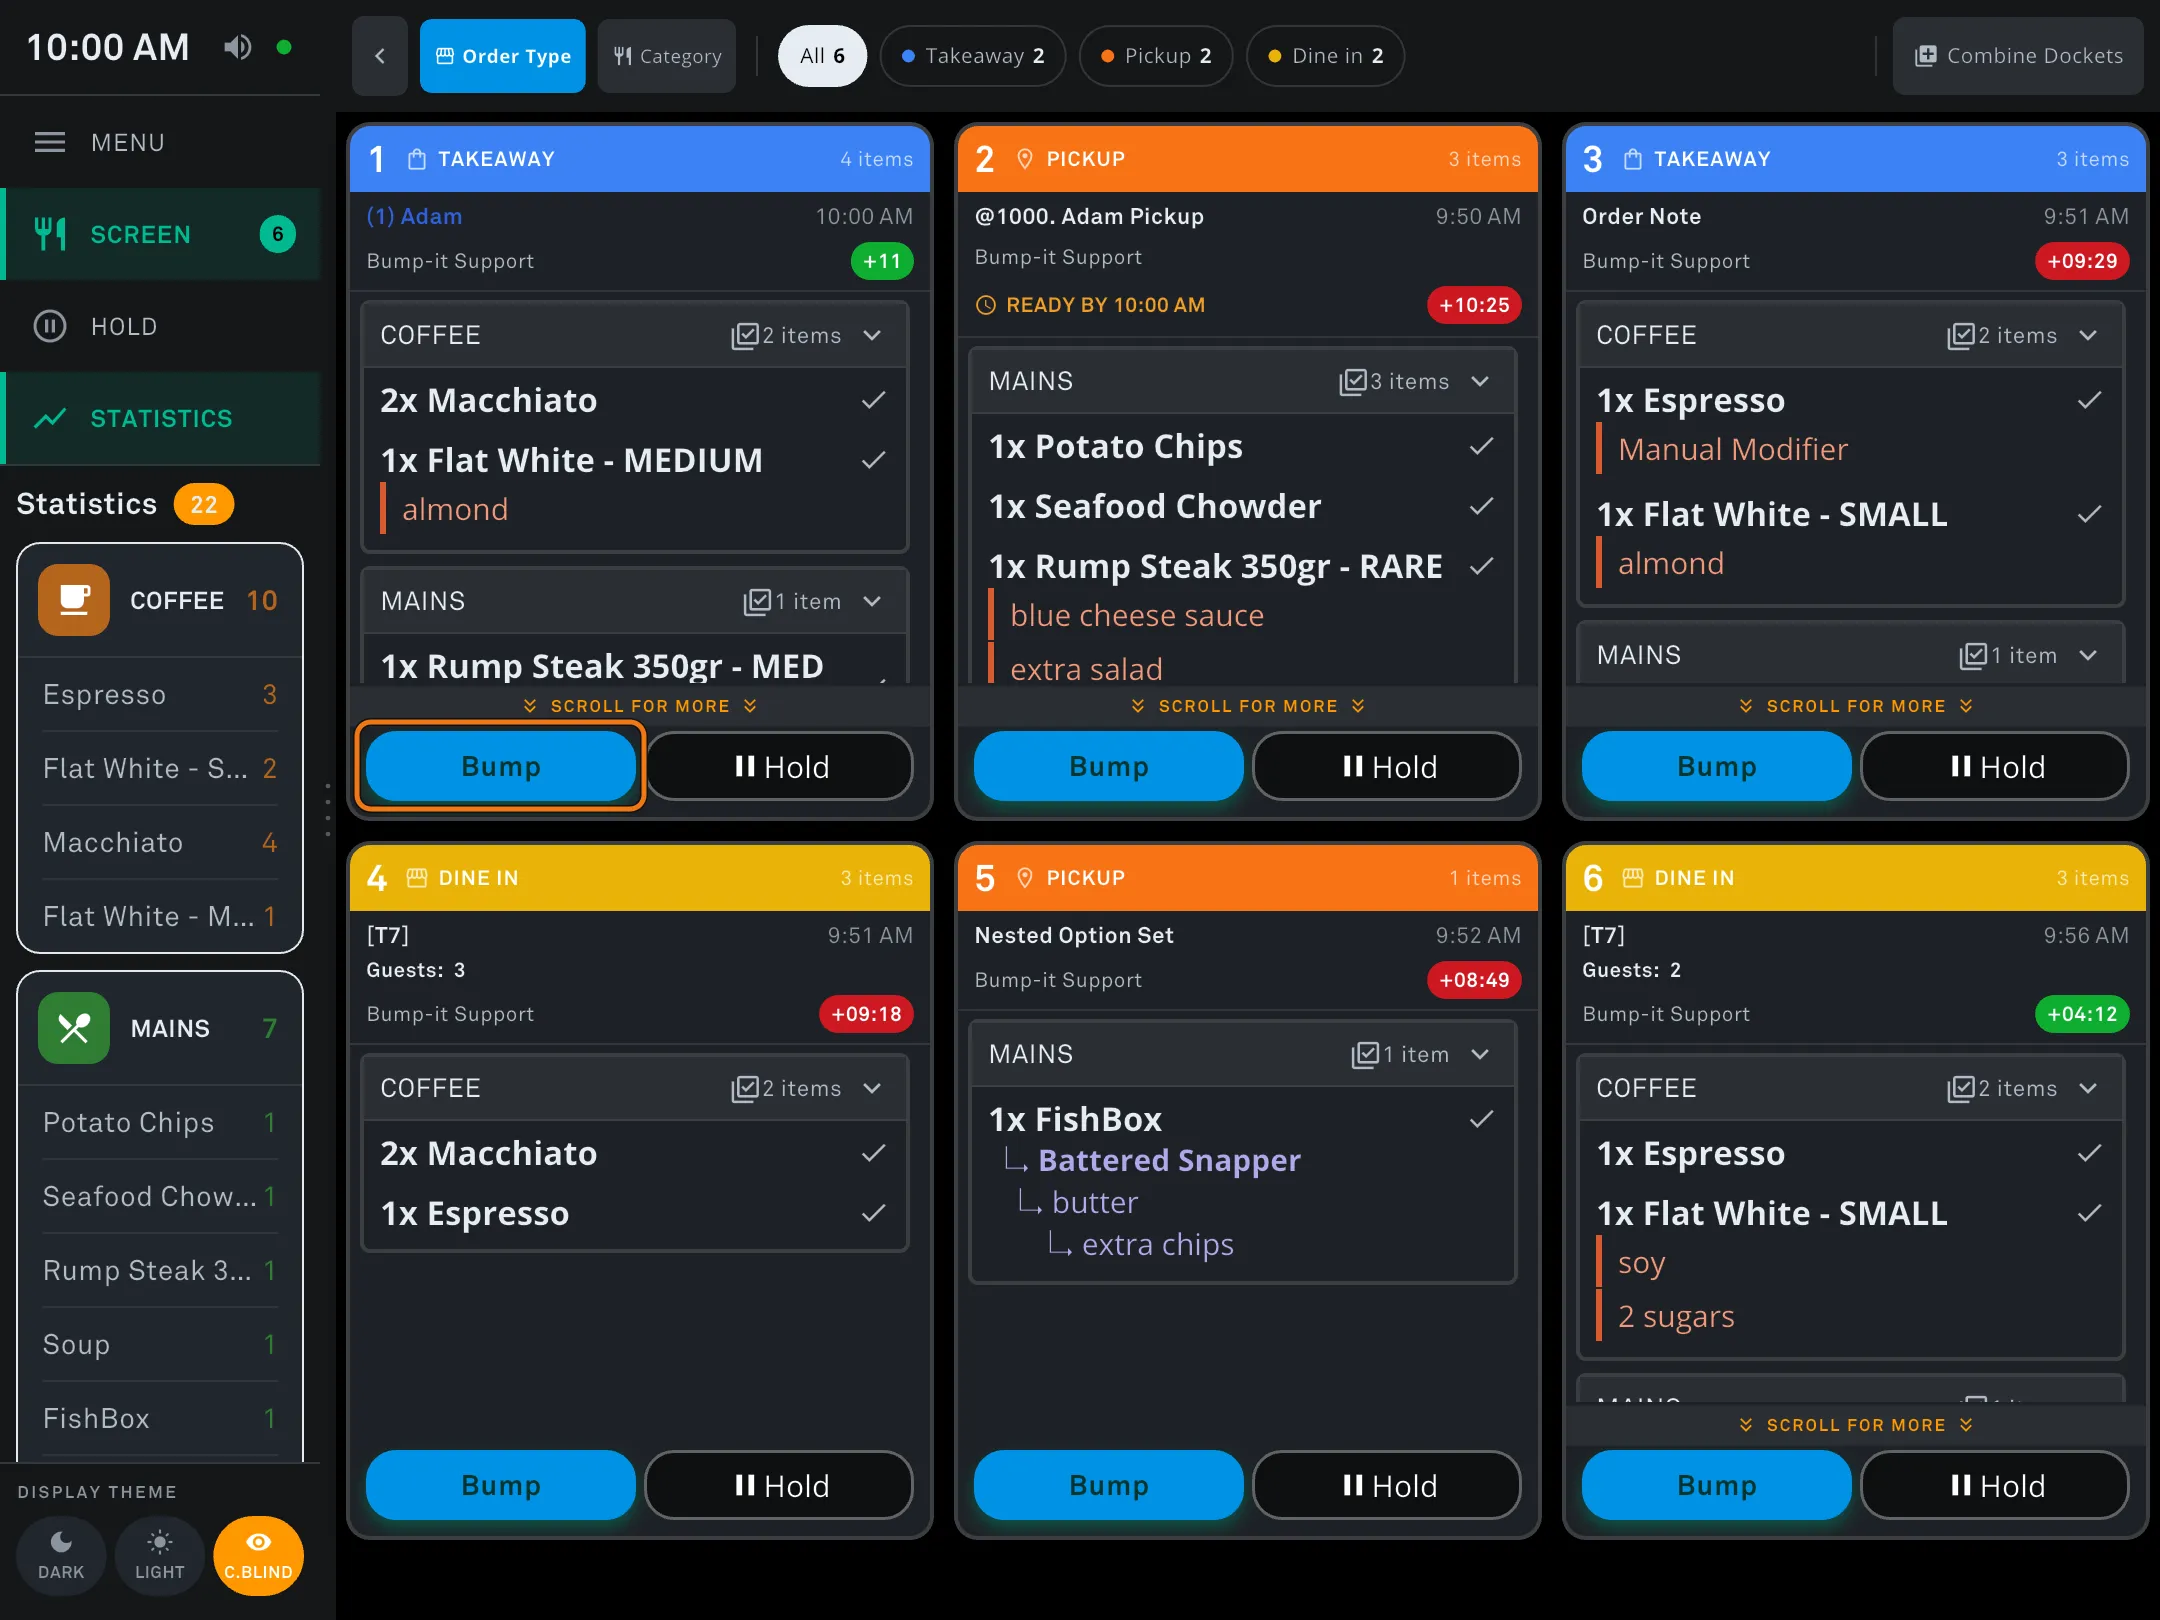
Step 17 — C.BLIND mode. Everything works the same; the Bump buttons change from green to blue.
Quick reference for staff
| Action | How |
|---|---|
| Bump one item | Press the item name |
| Unbump one item | Press the item name again |
| Bump every unit of one item | Press the tick beside the product name (requires Bump All Button on the filter) |
| Bump the whole docket | Press Bump |
| Undo a bumped docket | MENU → Order History → ** tap the order ** → Unbump |
| Hold a docket | Press Hold |
| Bring a held docket back | HOLD in the sidebar → Unhold |
| Combine dockets | Combine Dockets → select → Combine |
| Separate combined dockets | Press Undo |
| Cancel combining | Press the X |
| Show only one order type | Quick action bar → press the order type |
| Show every item in one category | Quick action bar → Category (shows Course instead if the filter groups by course) |
| See more of a docket | Scroll up and down within it |
| Expand a long docket | Tap the top of the docket |
| Close the expanded view | Press X |
| Collapse a category | Press the chevron on the category header |
| Change theme | DISPLAY THEME at the bottom of the left sidebar |
Troubleshooting {: #troubleshooting }
A product was ordered but never appeared. It is almost certainly not ticked on the Products tab of that filter. See Guide 3, Step 7.
A docket disappeared from one screen but not another. That is Device independent bumping working as set. See Guide 2, Step 3.
No new orders are coming through. Bump-it needs constant internet. Dockets already on screen stay put, but nothing new appears until the connection is back.
A docket keeps jumping to position 1. It is being unheld. A docket coming back from hold always re-enters at position 1 with a bracketed hold count against the order note.
I can’t edit a docket. Correct — the point of sale is the single source of truth. Dockets can’t be created or edited on the bump screen. Make the change in the POS.
There’s no Unbump button. Can Undo isn’t ticked on that device. See Guide 2, Step 3.
Source: “Bump-it New UI Setup Guide” recording, 28 July 2026, 13:48–23:42. App version v5.3.5-b.
Bump-it Kitchen Display Platform · bump-it.io · Percentage Plus Holdings Pty Ltd